Audio Interview
Use audio to help others speak their truth.
Everyone you know has stories to tell but not everyone knows how to conduct an interview that will draw those stories out. In this project, you will create a compelling audio interview with another person(s). You'll record your interview and combine it with a soundtrack and perhaps sound effects, editing it into a coherent and compelling story and sharing it to the cloud. It may be either uniquely personal, like those you hear on StoryCorp, or newsy, like those you hear on This American Life.
Audacity- Audio
- Interview
- Biography
- Storytelling
Learning Goals
After you finish this activity you will be able to:
- Produce an audio interview that tells a story
- Make a quality audio recording
- Do basic audio editing, combining voice and music tracks
- Share your work to the cloud
Follow these steps to complete the project.
To track your progress, click each step as you finish.
An excellent first step in creating any media work is to examine exemplary works of the same type. Make a list for yourself of what makes these examples strong and inspiring.
Don't skip this step!
| 1 | Get inspired by visiting the links in the Get Inspired box. |
By growing your skills in the tools used in any project, you save yourself time and produce stronger work.
| 2 | Peruse any or all of the tutorials in the Tame Your Tools box. |
When beginning a new media project, it's best to organize your resources in a single location.
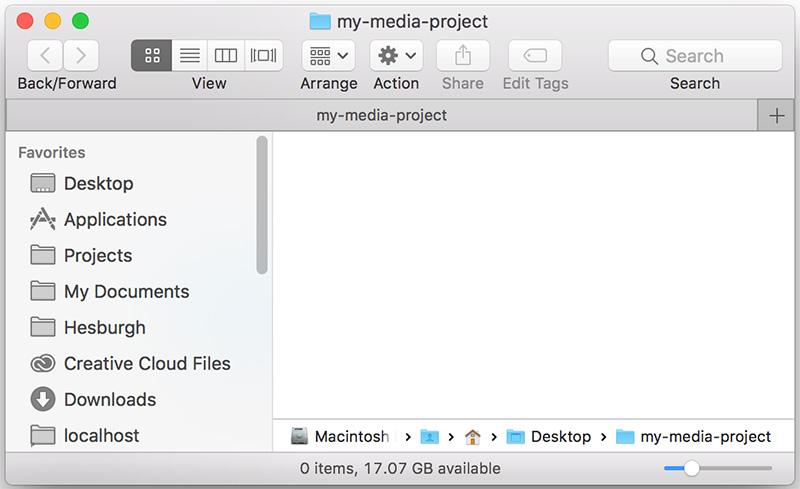
| 3 | Create a folder on your Desktop named something memorable, such as my-media-project. In this folder you'll organize all your resources for this project. |
Alternate File Storage
You may also organize your documents
in cloud storage, such as Box or Google Drive.
The research phase will help you clearly focus your interview.
| 4 | Identify the person you want to interview. Before contacting your subject, learn as much as you can about him or her. A simple internet search may produce enough information. You might also consider consulting a subject librarian when researching your subject's field. |
| 5 | Create a subfolder in your project folder called Notes. Use this for storing any notes or links you capture during your research. |
Interview questions should relate directly to the focus of your interview. For example, if interviewing an associate dean about a school policy, avoid overly personal questions. Instead, orient your questions around the pros/cons and history of that policy.
| 6 | Let's brainstorm some questions! Consult the List of Great Questions at StoryCorp as you create your questions. Make sure to save your question file ('brainstorm.txt') to your project folder. |
Getting the logistics for your interview right will impress your interview subject and help ensure a smooth interview. Make sure to clearly communicate expectations to your interview subject at all times.
| 7 | Choose a location to record your interview (if you can). Your location will help determine your choice of recording equipment. |
| 8 | Schedule a date and time to interview your subject. Reserve any space, props, etc., that you require. |
| 9 | Share your interview questions with the subject in advance and ensure the subject signs the Audio Recording Release Form, giving you the right to record, edit, and share the interview online. |
There are several options for recording your interview, from using professional equipment to using your own mobile device or computer.
| 10 | Choose a recording method/equipment. If you will be recording the interview out of doors, watch How to get good audio outdoors and consider reserving a professional microphone from OIT. |
The Hesburgh Libraries offers a sound-dampening Sound Booth with fabric walls in which you can record high-quality audio using your own laptop. For the best audio, we recommend you borrow a USB microphone.
Bookings do not include assistance with using the studio. For assistance, contact the Media Corps.
Faculty, staff and students may reserve audio recording equipment from OIT, such as the Tascam audio recorder, which can record two sources, bi-directionally, at once.
Equipment used for class assignments may often be reserved for free for brief periods. For more information, or to borrow equipment visit the OIT.
DeBartolo 115
(574) 631-6423
eventrentals@nd.edu
While the sound will be of higher quality using professional equipment, you may record your interview with your own computer or mobile devices. Audacity is a free, cross-platform application for recording and editing sound on a computer. There are also many apps available for recording your voice on a mobile device. One good option is the free app VoiceRecord Pro:
- VoiceRecord Pro (iOS)
- VoiceRecord Pro (Android)
For instructions on using VoiceRecord Pro to record audio, see Tame Your Tools. Note that you will need an adapter if you intend to connect a professional quality microphone to you phone or mobile device.
| 11 | Make sure to practice using your recording equipment—especially under conditions that will match your upcoming interview. |
Now, it's time to conduct the interview.
| 12 | Arrive early to your interview location and make any preparations required. |
| 13 | Prepare and test your recording equipment again on the day of the interview. Make sure you have installed fresh batteries and brought extras. |
| 14 | Before the interview starts, review the Audio Interview Quality Checklist. |
| 15 | Conduct the interview. Make sure to save your interview file(s) as MP3s to your project folder. |
If you intend to score your interview to music, choose a soundtrack which layers well behind the conversation. Make sure to choose music that matches the theme and tone of the interview.
| 16 | Visit the YouTube Audio Library. |
| 17 | Select the Free Music tab. |
| 18 | Search and filter for music by any combination of Genre, Mood, Instrument, or Duration. |
| 19 | Choose an Attribution option. We recommend "Attribution not required." |
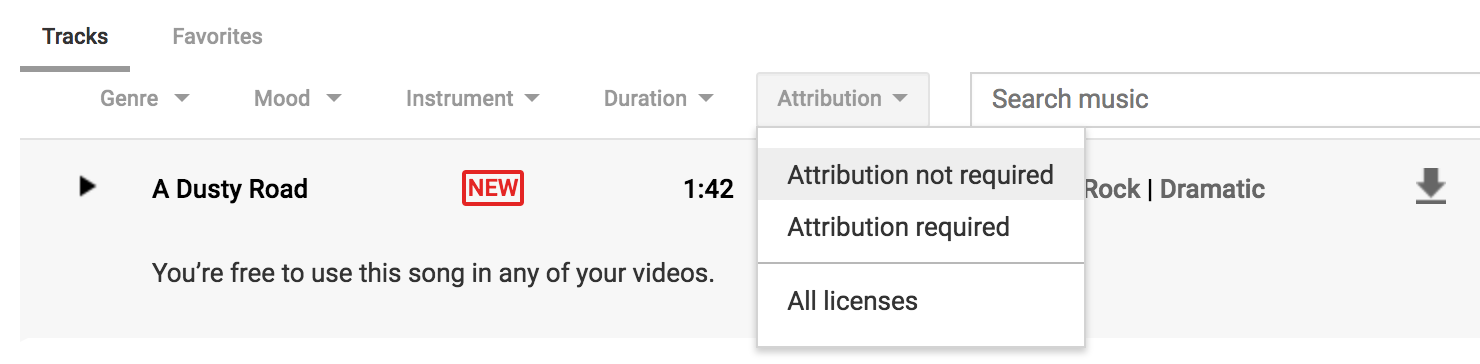
Giving Proper Attribution
If you choose the "Attribution
required" option, you must credit
the composer of any music you use in your project.
| 20 | Click the download icon to download the track (MP3) you choose. Save this soundtrack file to your project folder. |
Now, you'll create an audacity project for layering together all the audio you've found and created.
| 21 | Launch Audacity on the computer you are working on. If you are working on your own computer, you will want to download Audacity if you have not already done so. |
| 22 |
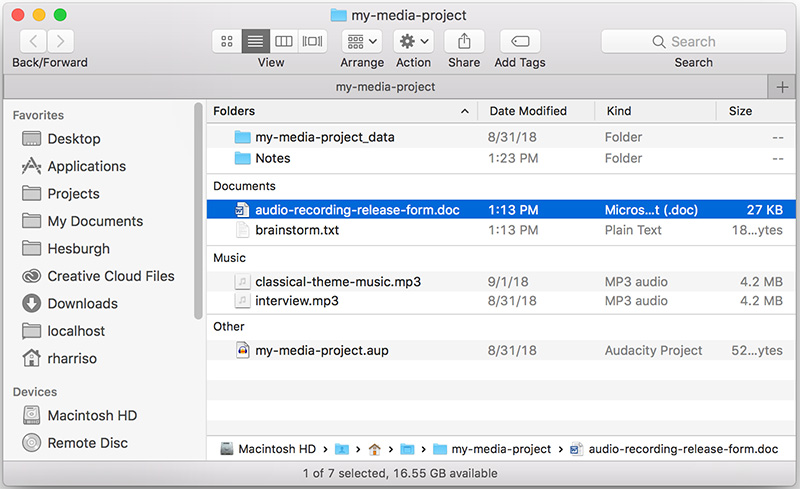
Save your Audacity project file (.aup) in your my-media-project folder. Audacity will also add a resources folder called where-from-audacity-project_data, which you may safely ignore. Your project folder should now contain:
|
Next, we'll import your recorded interview file(s) and your soundtrack and any sound effects into your new Audacity project.
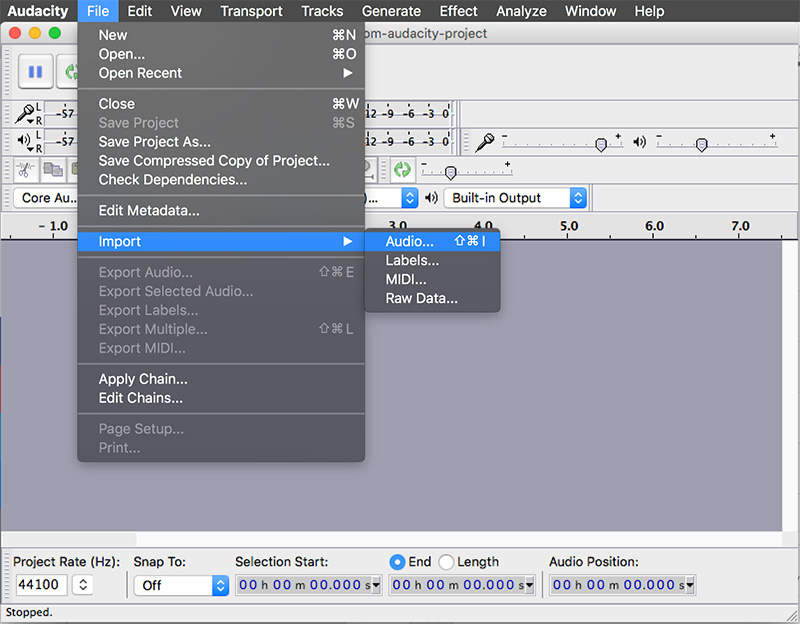
| 23 | With your Audacity project open, select to import the MP3 of the interview take(s) you intend to use. |
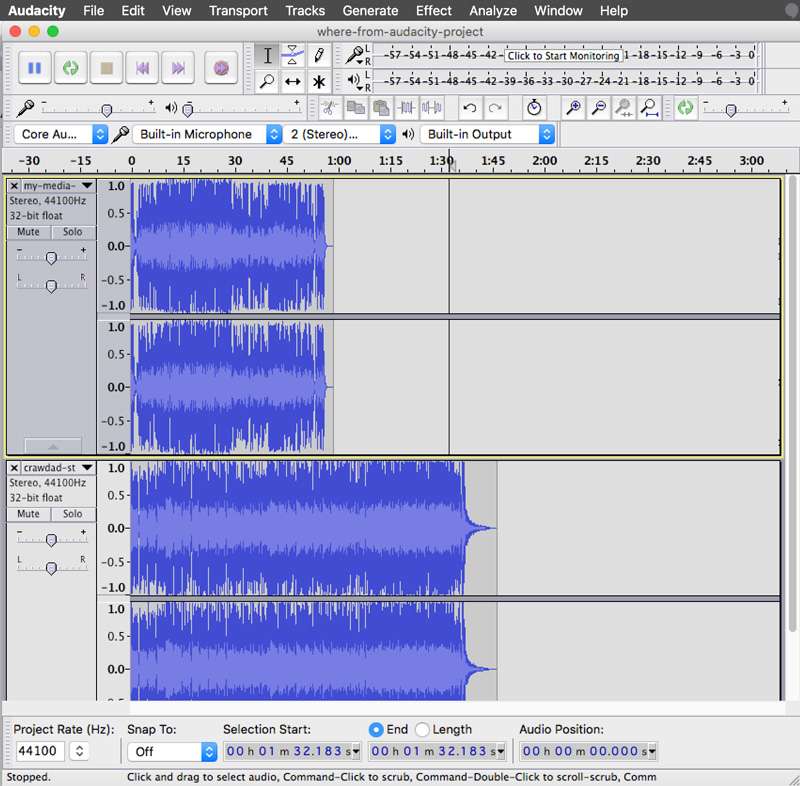
| 24 | Repeat step 23 to import the MP3 of your soundtrack and any sound effects you may be using. When you are finished, your project window should show these tracks stacked on top of each other. |
In this step, you will edit each of your tracks, layering and syncing them so that they sound like one polished audio track, beginning to end. Remember that the volume level of the soundtrack should be low enough that it underscores your interview rather than dominating it.
| 25 | If you haven't already done so, watch How To Record and Edit Audio In Audacity. We highly recommend the Learning Audacity course on LinkedIn Learning if you intend to do advanced editing, such as layering in sound effects. |
| 26 | You may use the selection tool () to cut unwanted parts from your audio track, and cut-and-paste audio within and between tracks. |
| 27 | You may use the time slider tool () to sync tracks, shifting each track forward or back in relation to each other. |
| 28 | Finally, select the audio you wish to fade out and select from the application menu. Feel free to experiment, applying various effects and filters to your audio which seem appropriate. |
| 29 | Make sure to save regularly as you edit your project file (.aup). |

Now, you'll need to export your interview to a format which can be shared on the web, such as MP3.
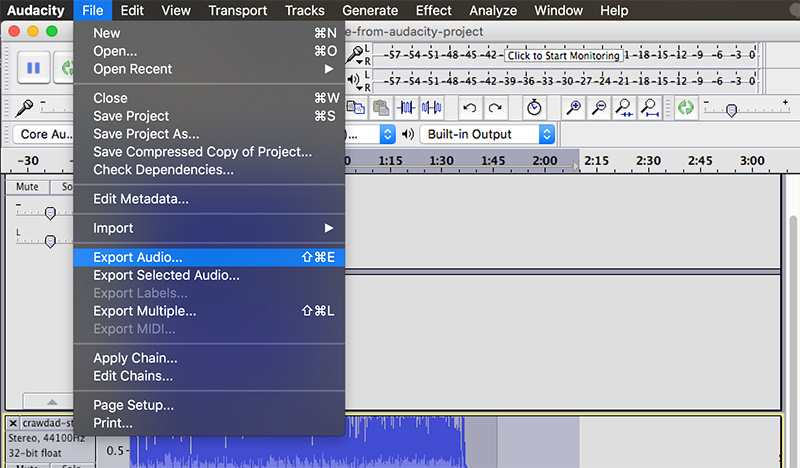
| 30 | Select from the application menu to export your project to an MP3 file. |
| 31 | Navigate to your project folder to save your polished interview file as an MP3. Name the file "interview-final-mp3" (or anything memorable which will distinguish it from the rough audio files you used to make it). Select and choose "MP3 Files". |
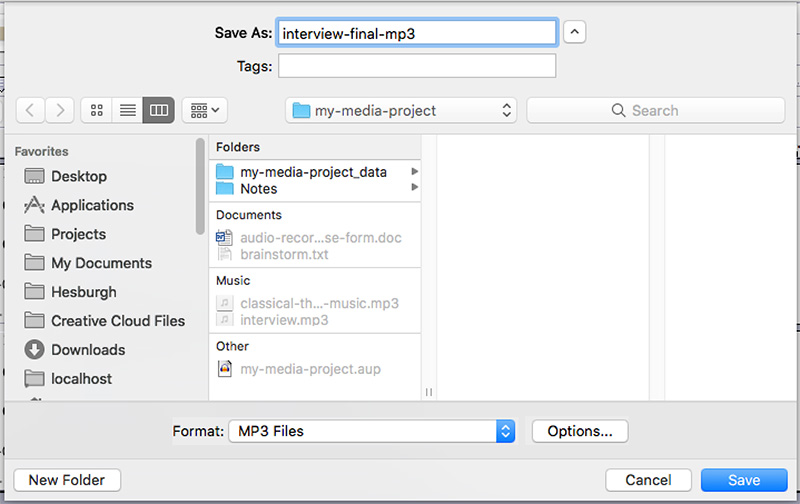
| 32 | Select the button to open the window, where you'll set the to 'Constant', the to '320 kbps', and to 'Joint Stereo'. |
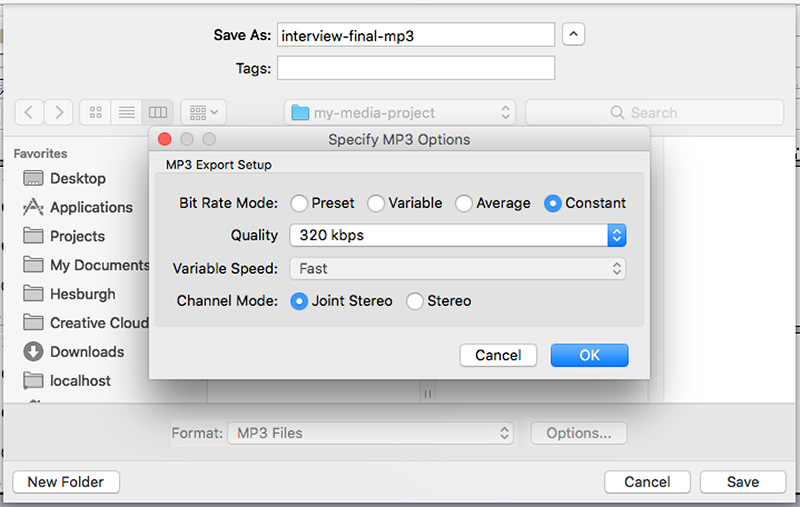
| 33 | Click to close the window. Then click the button to export your MP3. |
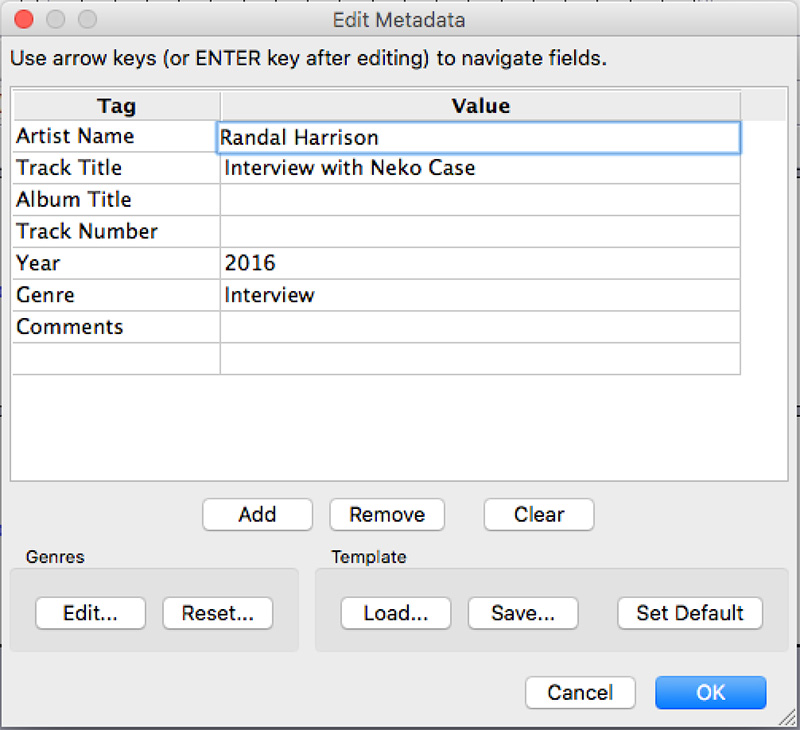
| 34 | The last step before saving asks you to provide metadata in the window. This step is optional, but recommended. Click to continue. |
In this last step, you'll upload your interview to Soundcloud, to share with others.
| 35 | Login to Soundcloud, a cloud-based platform for sharing audio. You may create your own account or sign in using your Notre Dame Google Account. |
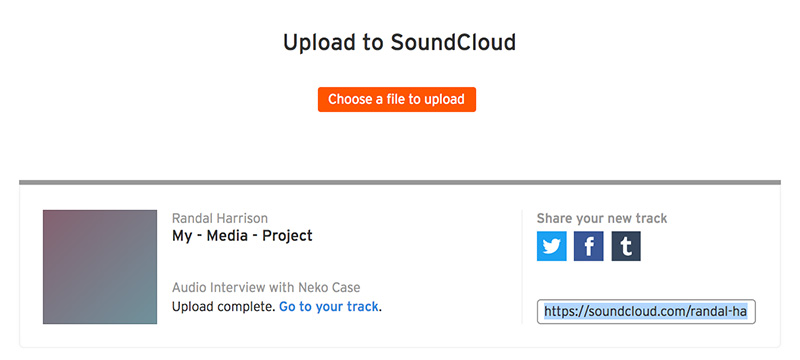
| 36 | Select from the application menu. Click the button and navigate to your project folder. Select your finished project MP3 and click . |

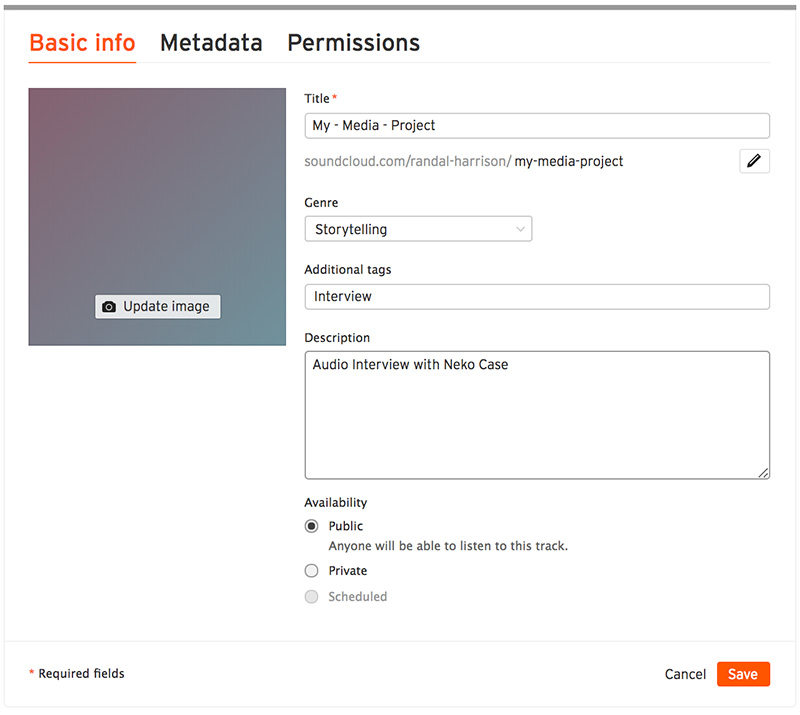
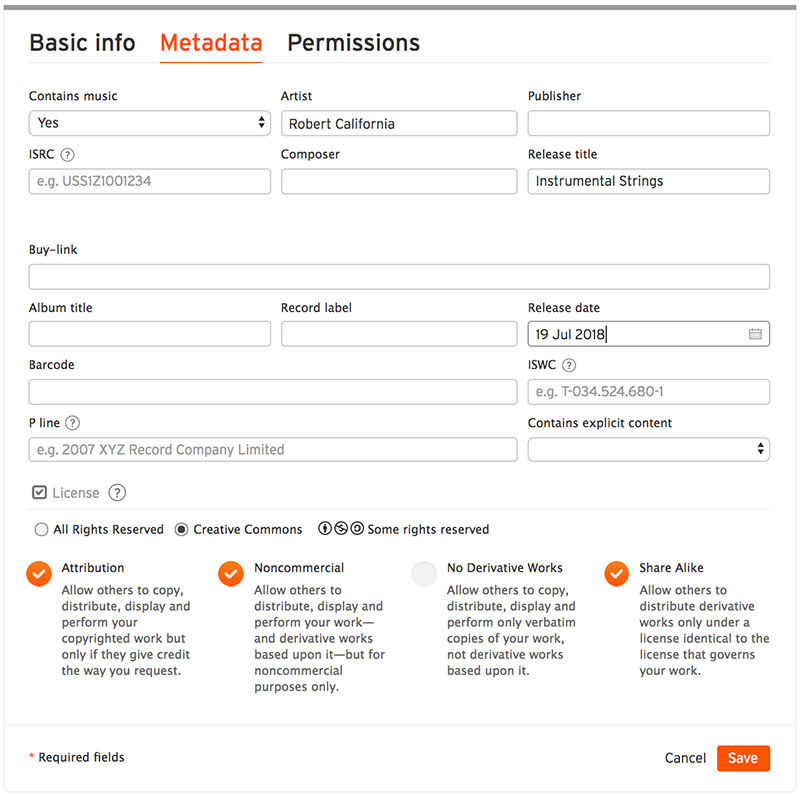
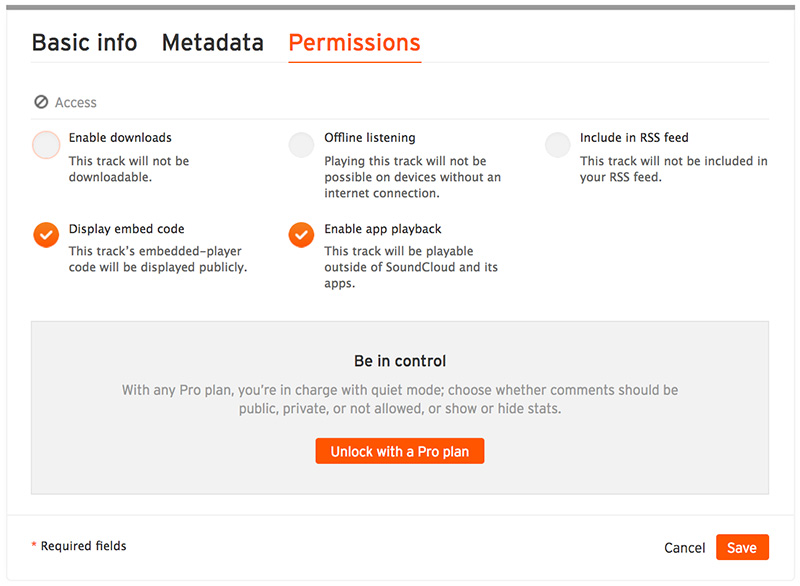
| 37 | Add information as desired in the Basic Info, Metadata, and Permissions window and click . Remember to set the project to Public in order for others to find and listen to it online. |
| 38 | Your Audio Interview is now live and public in the cloud. Copy the link to email or share your link on social media! |
Congratulations!
You've grown your multimedia literacy while creating cool things! Well done, you!
You might consider nominating work you are proud of to the Remix Project Showcase!

Example

Get Inspired
Explore examples of similar projects.
Tame Your Tools
Get Help
Notre Dame has many helpful resources, including our Media Corps coaching staff, located in the Hesburgh Library.
Give Feedback
Remix is continually evolving. Please help us improve by providing feedback on this project or any other feature of Remix.