Audio 101
Audio continues to be an important way that people receive information and learn.
It is used to enhance users' experience by adding emotional resonance or realism, reaching learners inclined toward verbal description or instruction, and engaging users through multiple modes of meaning-making. And while a project where you work with sound alone can seem easier than using images or video—you don’t have to worry about lighting, clothing, or photobombs—there's a lot to know about producing good quality audio media.
Composing Music
While many of the projects incorporate music created by others, we do not address the process of
producing your own music.
Why Audio?
Working with audio-only is different from working with video or images. Even though video is tremendously popular, audio-only continues to be a vibrant medium for learning and sharing experience.
- There is nothing to look at, so we must evoke visual images with words.
- Editing audio provides an introduction to working with video. It’s time based but there are no issues with lighting or focus. We also don’t have to sync visual with sound.
- For media consumers, audio is useful in situations where they can’t look at a screen, such as driving or jogging.
- Since narration is the central element, audio emphasizes the characteristics of a speaker’s voice - pitch, intonation, etc.
- Without visuals, a music soundtrack is a critical option for setting emotional tone.
- Voice narration is normally written in conversational language - like listening to NPR, as opposed to reading an academic journal.
Audio production generally follows three phases.
1
Pre-production—Prepare, Plan, Gather
Pre-production is the work done before recording begins. It includes activities like organizing the project, clarifying the message, preparing locations, scheduling, finding people, and gathering equipment, and writing a script or interview questions, according to the needs of your project. Investing time at this stage makes future steps easier.
Decide what equipment you want to use and practice with it ahead of time. You have several options for devices:
- Smartphone—can make a good quality voice recording
- Laptop or desktop computer - use a good external microphone; the internal mic is probably not good quality. It's also hard to get close enough to it
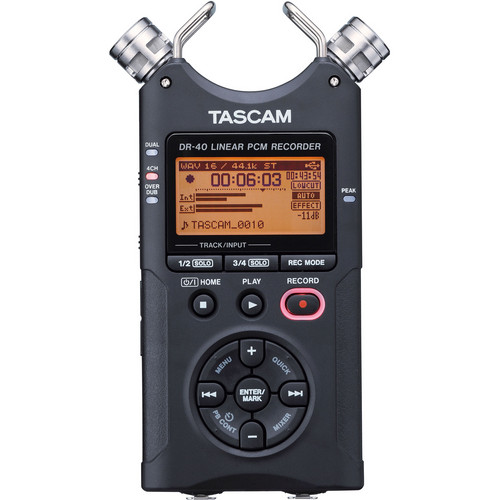
- Tascam audio recorder—requires a little prep, but makes great recordings.
When interviewing it can be awkward to pass the mic back and forth. You will get the best sound if both interviewer and subject have microphones. Here are three options:
- Use two separate devices (e.g., Tascam recorder and smartphone)
- Connect an external microphone to a Tascam recorder and then capture internal and external mics at one time.
- Record the interviewee live and add your questions later.
With any of these scenarios you will have to mix two voice tracks together later on.
What is Noise?
Noise is any sound you don’t want to record. Some noises are hard to miss, like slamming doors or thunder. Some we are used to: a computer fan or the hum of a fluorescent light. Others are easy to ignore while making a recording; tapping a desk or rustling paper. On the other hand, there may be times when you want to record environmental sound. If you’re talking about a restaurant, you may want to capture the ambient sound at the location. It’s very easy to add background sound after recording. As far as the inverse goes, it’s not always easy to remove unwanted noise.
Where you record is very important. The Hesburgh Libraries offers a sound-dampening Sound Booth with fabric walls in which you can record high-quality audio using your own laptop. For the best audio, we recommend you borrow a USB microphone.
Bookings do not include assistance with using the studio. For assistance, contact the Media Corps.
Line up people who can help. If you’re doing a class assignment, find out if it’s okay to recruit “talent” with a smooth speaking voice. When interviewing it may be very useful to have a third person who can hold a mic or monitor the volume on a recorder.
2
Production—Set up, Capture, Pack up
This is when the raw sound files are produced. After arriving at the location, the recorder is set up, talent are miked, and voices are recorded. In major projects production is considered the point of no return.
Tips for the best original voice recordings
- Capture multiple takes and record through errors
- Do whatever you can to avoid unwanted noise.
- Set the volume high but stay out of the red zone.
- Wear headphones while recording in order to catch problems.
- Add quiet time – record 2-3 seconds of silence before you start and at the end.
- Speak clearly – slow down and enunciate.
- Keep the mic close to your mouth—approximately 5-7 inches away

Copyright
There’s no copyright issue with simply recording your own voice and posting it online. It only gets interesting when you add third party music or sound effects. There are very specific conditions under which you can apply “fair use” principles to a school project. However, for the sake of simplicity we encourage you to only use music that has a Creative Commons (CC) license. With “royalty free” music you pay once up front. After that you don’t have to pay a royalty fee every time the piece you create is played. There may also be restrictions on how it can be used.
Download sound files
- Music soundtrack—Always use instrumental music. The lyrics of a song can distract and confuse listeners. The YouTube Audio Library has a large collection of instrumental tracks with CC licenses.
- Sound effects—well-selected sound effects can help get a message across. Be careful; too many can be distracting and poorly recorded effects can take away from an otherwise high quality piece. Sources for CC sound effects include Freesound.org and YouTube Audio Library.
3
Post-production—Edit, Revise, Publish
At this stage, raw media are selected, sequenced, corrected, and edited. Credits, effects, and music are also added. First a rough cut is produced, then a final cut. Finally the product is posted online or distributed in another way.
Fix and Mix
After capturing your recordings there are several things you'll need to do with the editing software.
Fix
- Adjust volume
- Cut out mistakes—"ums," "ers," etc.
- Move sections around
- Fade in and out
- Reduce background noise
- Add bass
Mix
- Clips from different takes
- Sound effects
- Music tracks

Export and Post
- Export your project to a file that can be easily played. MP3 is the standard compressed audio file format.
- SoundCloud is the equivalent of YouTube for sound. Use your Google account to log in and you can post 180 minutes of material for free.
Get Inspired
Hear inspiring audio projects.
- Serial
Podcast - We Believe We Are Invincible
Audio Essay - Hit Record
Creative Community - Pulling
Back the Curtain
How NPR Edits Audio - Story Corps
Oral History Project - I Know That
Voice
Documentary - Sound
Stories
Human Sound Effects - Soundcities
Urban Sound Recordings - Wild Sanctuary
Natural Soundscapes
Borrow Equipment
Audio equipment resources on campus.
Audio Libraries
Download music and sound effects.
Sound-editing Applications
Get Help
Notre Dame has many helpful resources, including our Media Corps coaching staff, located in the Hesburgh Library.