Video Essay
Use video to enhance the traditional essay format.
The term video essay is applied to a wide variety of works. The project described here is a five-minute narrated mashup of video clips and other media that advances an argument. Subjects that lend themselves well to this genre include history and popular culture. Similar to traditional textual essays, which use quotations to authoritatively support claims, video essays rely on video 'evidence' to support their claims.
Premiere- Video
- Essay
- Rhetoric
Learning Goals
After you finish this activity you will be able to:
- Demonstrate mastery of a topic in media or popular culture
- Produce a persuasive essay in video form
- Record a clear, expressive voice narration without distortion or noise
- Capture video clips from DVD or online sources
- Edit video clips together with smooth cuts and transitions
- Respect copyright laws by following fair use practices and citing sources.
Follow these steps to complete the project.
To track your progress, click each step as you finish.
An excellent first step in creating any media work is to examine exemplary works of the same type. Make a list for yourself of what makes these examples strong and inspiring.
Don't skip this step!
| 1 | Peruse any or all of the links in the Get Inspired box. |
By growing your skills in the tools used in any project, you save yourself time and produce stronger work.
| 2 | Peruse any or all of the tutorials in the Tame Your Tools box. |
When beginning a new media project, it's best to organize your resources in a single location.
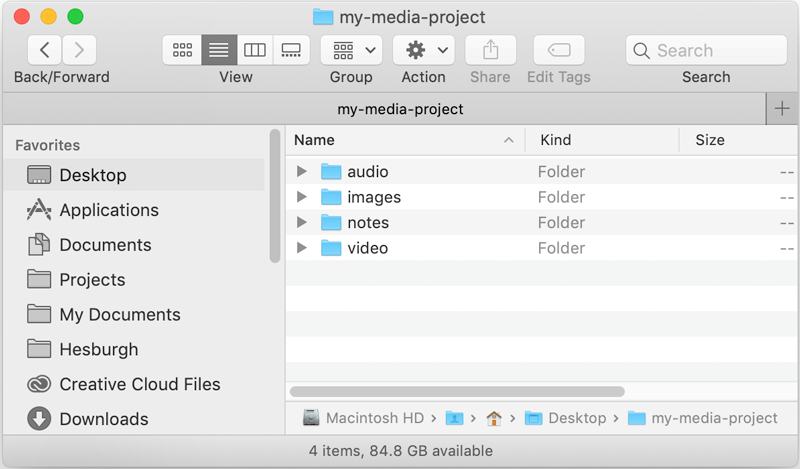
| 3 | Create a folder on your Desktop named something memorable, such as my-media-project. In this folder you'll organize all your resources for this project. |
| 4 | Create sub-folders in your project folder titled notes, images, audio, and video. You will use these folders to store research notes, still images and other visual resources, audio, and video, respectively. |
Alternate File Storage
You may also organize your documents in cloud storage, such as Box or Google Drive.
The research phase will help you clearly identify the question or problem you wish to answer or address in your essay.
| 5 | Begin by asking yourself these questions:
|
| 6 | A simple internet search may produce enough information, but your best bet is to use the resources of the Hesburgh Libraries, including consulting a subject librarian when researching your subject's field. |
| 7 | Save any research notes in your notes subfolder. |
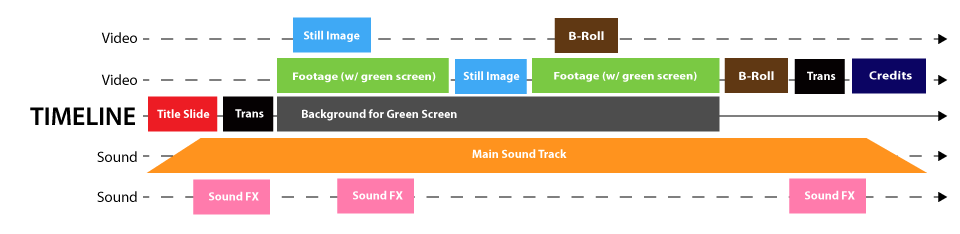
In this step, you'll plan the entire structure of your video essay.
| 8 | If you have not done so, review best practices in creating video essays with the tutorial, The Video Essay as Art. |
| 9 | Navigate to our Video Essay Script Template. Then, select File > Make a copy to copy the template to your own Google Drive. |

| 10 | Fill out the script template as completely as possible. Make a note of all the props and other media you will need and carefully script the things you will see and say during each shot. |
| 11 | Now, you'll run through the script before committing it to video. We recommend you ask one or two people unfamiliar with the product to run through the script with you verbally and get their honest feedback. Adjust your script as necessary. |
| 12 | When you have finalized your script, we recommend saving a copy of it in your notes subfolder. |
×
Pro Tip
The more time you spend thoroughly scripting (and/or storyboarding) your essay beforehand, the less time you will spend in editing. You are also less likely to have to re-shoot sequences if you plan well
beforehand.
Now that you have used the script template to visualize the structure of your video essay, you will want to create a preliminary media inventory.
There are several options for capturing original footage, from using professional equipment to using your own mobile device or computer.
| 14 | Choose a recording method/equipment. |
The Hesburgh Libraries offer three Multimedia Studio which faculty, staff, and students may use to create professional quality video recordings. The Multimedia Studio is equipped with a green screen, a high quality microphone, a professional grade video camera, and mounted lighting for recording high quality video simply by plugging in a flash drive.
Studio access may be limited due to the COVID-19 pandemic. Email cds@nd.edu for more information.
Faculty, staff and students may reserve video recording equipment from OIT, such as the JVC ProHD Camera, the Nikon D7100 with full HD video capability, or the GoPro HERO4 with 4K video recording.
Equipment used for class assignments may often be reserved for free for brief periods. For more information, or to borrow equipment visit the OIT:
DeBartolo 115
(574) 631-6423
eventrentals@nd.edu
While the video will be of higher quality using professional equipment, you may record your digital story with your own phone or other mobile device.
| 15 | Save all recorded video to your video subfolder. |
Optionally, choose a soundtrack and sound effects to layer behind your essay. Make sure to choose music and effects that match the theme and tone of the video.
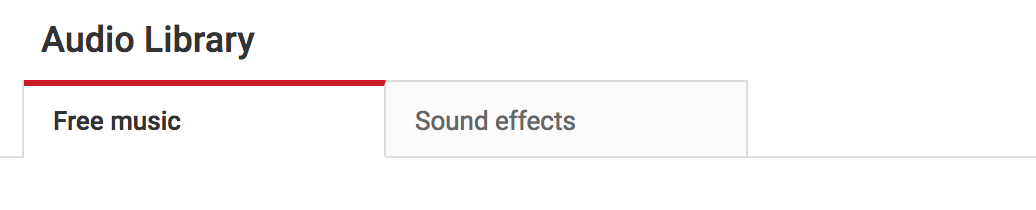
| 16 | Visit the YouTube Audio Library. |
| 17 | Select the Free Music tab. |
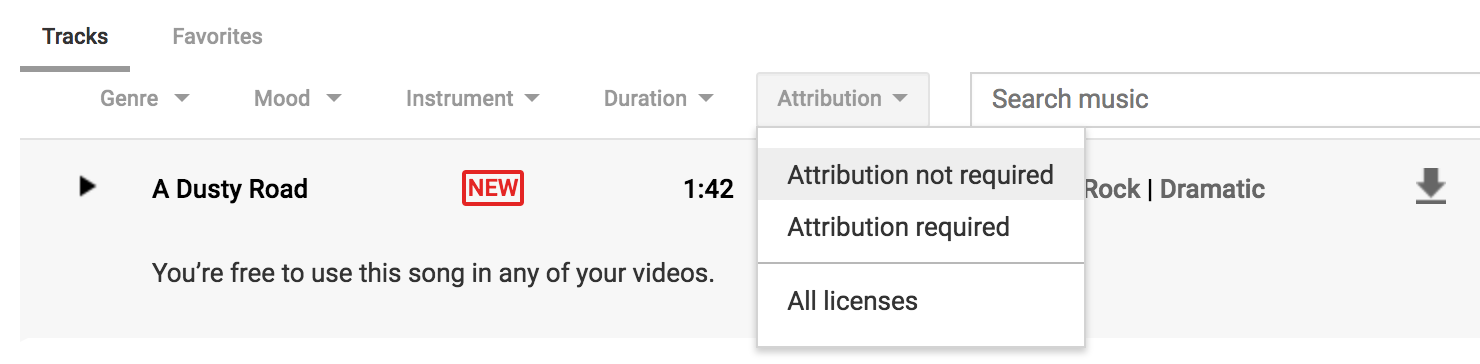
| 18 | Search and filter for music by any combination of Genre, Mood, Instrument, or Duration. |
| 19 | Choose an Attribution option. We recommend "Attribution not required." |
Giving Proper Attribution
If you choose the "Attribution required" option, you must
credit
the composer of any music you use in your project.
| 20 | Click the download icon to download the track (MP3) you choose. |
| 21 | Save all downloaded audio (and attribution information) to your audio subfolder. |
You may need to take your own photos.
| 22 | You may take your own photos with a phone or mobile device. For higher quality images, consider reserving cameras and photography accessories from OIT, such as the JVC ProHD Camera, or the Nikon D7100. |
| 23 | You may use the scanners in the Hesburgh Library to scan any printed photos you wish to use. |
| 24 | Save all still images to your images subfolder and credit any authors whose resources require attribution. |
You will likely want to combine still images with video in this project. There are many sources of free or royalty-free images available.
| 25 | For third-party images, you might search Pixabay and Unsplash directly. You might also search across multiple image repositories with the Creative Commons search portal. |
| 26 | Save all third-party still images to your images subfolder and credit any authors whose resources require attribution. |
Now that you've written your script and gathered your audio, video, and still images, you're ready to create your video essay in Adobe Premiere Pro.
| 27 | Open Adobe Premiere Pro and select New Project... to begin a new project. |
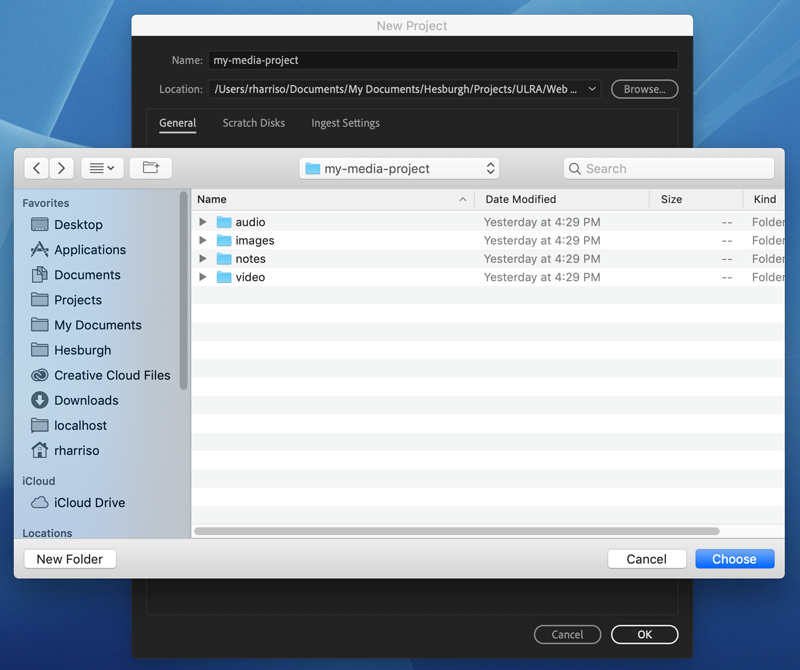
| 28 | In the window that opens, enter a name for your project in the Name field. |
| 29 | Click Browse... and navigate to your my-media-project folder. |
| 30 | Click the Choose button to close the browsing window. |
| 31 | Leave the other settings as they are and click the OK button. |
×
New Folders Added
Once you create and save your project, Premiere Pro will create 2 additional folders in your project folder: "Adobe Premiere Pro Captured Audio," and "Adobe Premiere Pro Captured Video." You may safely ignore
these folders.
In this step, you will upload to the Premiere Pro media browser all of the media you have gathered so far.
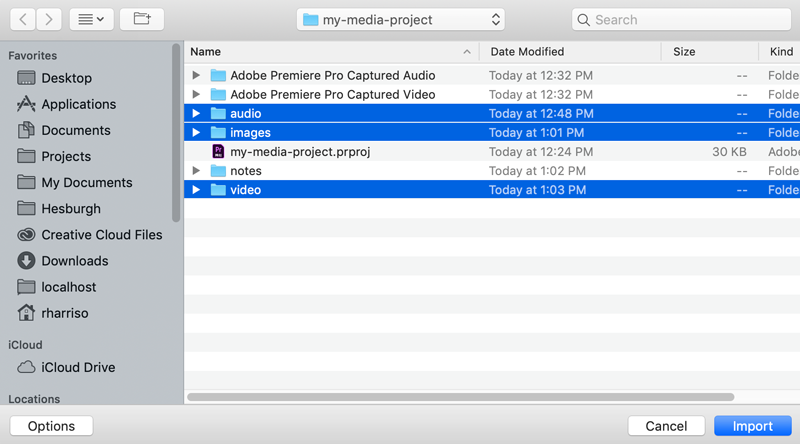
| 32 | In Premiere Pro, select File > Import from the application menu. |
| 33 | In the browsing window, navigate to your my-media-project folder. Holding down CMD (Mac) or CTRL (Windows), click each of your audio, images, and video folders to select it. With all three folders selected, click the Import button to import them. |
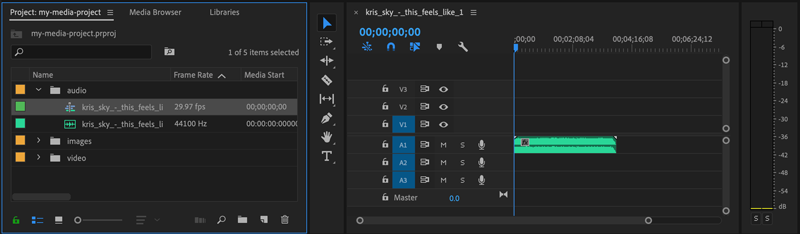
With your files well organized into folders in your project media browser, you are ready to edit and assemble them into your video essay.
| 34 | Before you begin editing with Premiere Pro, review Adobe's Editing Tutorials. You may also consider taking the Premiere Pro Essentials course at LinkedIn Learning |
| 35 | Now, begin by selecting any video clip from your project and dragging it to your timeline to initialize it. |
| 36 | Next you'll add and edit together the images, audio, and any additional video you've gathered. |
| 37 | Next, you'll add any transitions and lower thirds. Don't forget to add a title screen and a credit screen (citing any sources which require it). |
×
Need Some Help?
Notre Dame students, faculty, and staff who are creating multimedia work can get face-to-face support from the Media Corps coaches — a team
of undergrads who can help you learn how to capture, edit, and produce digital media. And Media Corps coaches are trained on all Remix projects!
In this step, you will export your finished video essay to to a format that can be uploaded to the cloud.
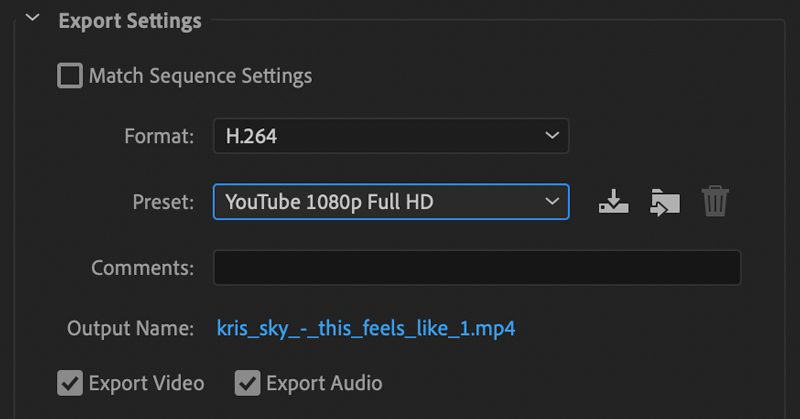
| 38 | Once you are satisfied with your video essay, select File > Export > Media In the export window that opens, find the Export Settings panel
and make
the following settings:
|
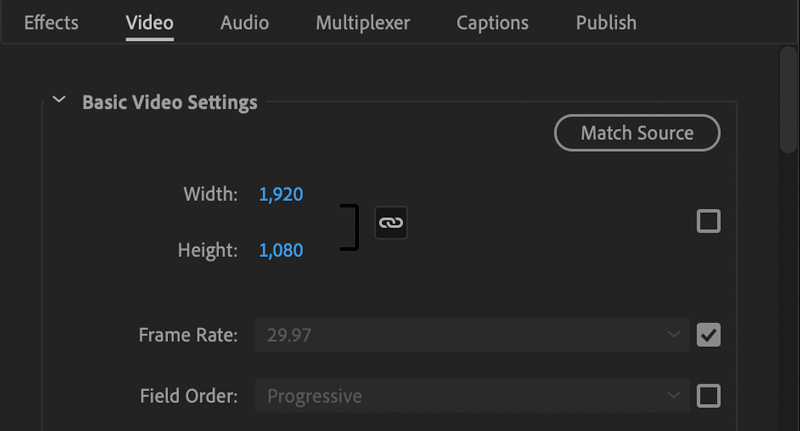
| 39 | Under the Video tab (directly below) click the Match Source button to use the preferred settings for this encoding style. |
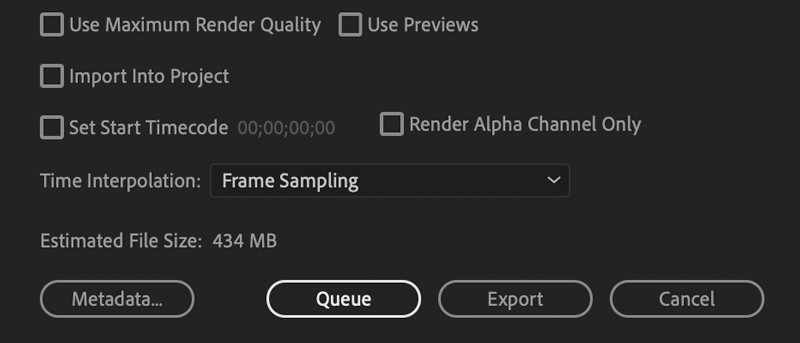
| 40 | Now, select the Source Range dropdown and select Entire Sequence. |

| 41 | Finally, click the Export button to save your file. |
In this step you will upload your MP4 to YouTube to share with others online.
| 42 | First, review best practices in Uploading a video to YouTube. |
| 43 |
Upload your video, being careful to set the metadata for at least:
We recommend you provide this optional metadata information, where possible or necessary:
|
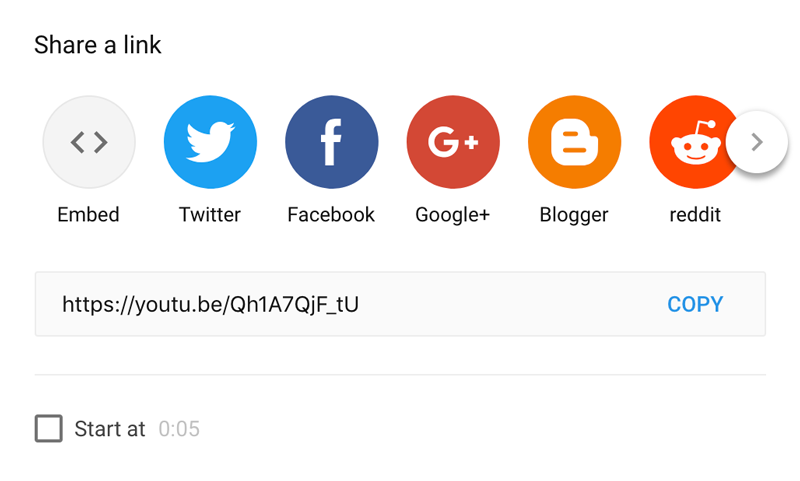
| 44 | Finally, share your video via link or directly through social media. |
Congratulations!
You've grown your multimedia literacy while creating cool things! Well done, you!
You might consider nominating work you are proud of to the Remix Project Showcase!

Example
Get Inspired
Tame Your Tools
Get Help
Notre Dame has many helpful resources, including our Media Corps coaching staff, located in the Hesburgh Library.
Give Feedback
Remix is continually evolving. Please help us improve by providing feedback on this project or any other feature of Remix.