Web Comic
Inform, explain, and entertain through illustration.
Comics are deliberate sequences of still images that, often combined with minimal text, tell a story. A webcomic is published online and can occupy any genre—from absurdist humor to folksy commonplaces to deeply political commentary. You can illustrate a scientific discovery, tell a personal story, or show how to do something with a web comic. In this project, you will create and share to the cloud a web comic you design using the web comic creation software Storyboard That.
Storyboard That- Web
- Digital
- Storytelling
Learning Goals
After you finish this activity you will be able to:
- Tell a story in images with a clear beginning, middle, and end
- Use visual language to convey meaning with symbols and other techniques
- Use web comic software competently
- Follow design conventions in creating a visual narrative
- Lorem ipsum dolor sit amet, consectetur adipisicing elit.
Follow these steps to complete the project.
To track your progress, click each step as you finish.
An excellent first step in creating any media work is to examine exemplary works of the same type. Make a list for yourself of what makes these examples strong and inspiring.
Don't skip this step!
| 1 | Peruse any or all of the links in the Get Inspired box. |
By growing your skills in the tools used in any project, you save yourself time and produce stronger work.
| 2 | Peruse any or all of the tutorials in the Tame Your Tools box. |
When beginning a new media project, it's best to organize your resources in a single location.
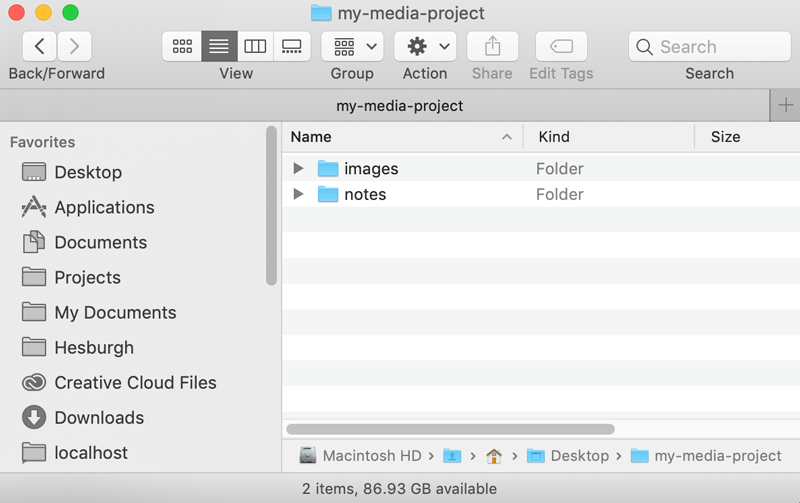
| 3 | Create a folder on your Desktop named something memorable, such as my-media-project. In this folder you'll organize all your resources for this project. |
| 4 | Create sub-folders in your project folder titled notes and images. You will use these folders to store research notes, and all project images, respectively. |
Alternate File Storage
You may also organize your documents in cloud storage, such as Box or Google Drive.
In this step, you'll create a very rough sketch of the story—noting for yourself the backgrounds, characters, action, and dialogue. Wire- or stick-figures are fine for this stage, as you'll be using the pre-made resources of the Storyboard That platform.
| 5 | If you have not yet done so, view the tutorials on storytelling and layout by Mark Crilley in the Tame Your Tools box. |
| 6 | Download and print several copies of the Web Comic Storyboard Template. Use
them to wireframe / sketch your comic:
|
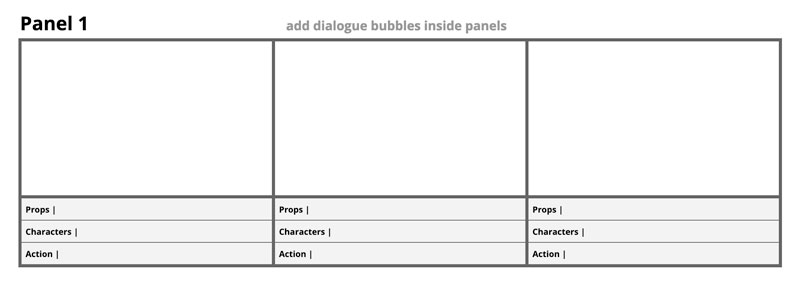
| 7 | Digitally scan your completed storyboard(s) and save the copies to your notes folder. |
Now that you've done a first draft of your web comic by hand, you'll login to Storyboard That and begin creating the digital version of your web comic.
| 8 | If you have not already done so, review the tutorial, Getting Started With Storyboard That. |
| 9 |
Visit the Storyboard That website. To get started, simply click on the Create a Storyboard button. 
|
| 10 |
Next, click on the Storyboard Layout button. Select your Cell Layout and Storyboard Layout options. 
|
Now that you've chosen your web comic layout, you'll add backgrounds to each of your panels.
| 11 | First, select a location from the Scenes tab.
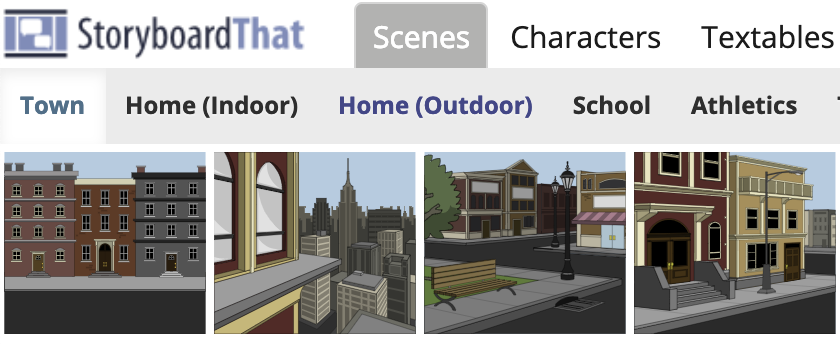
|
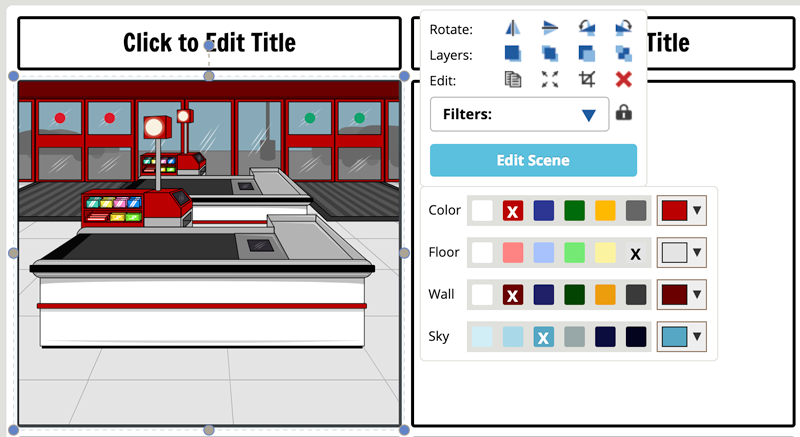
| 12 | Next, set your background image for any panel by clicking and dragging the image directly on top of the panel. |
| 13 |
Now, customize your background image by clicking it. You may customize a range of attributes, such as changing the time-of-day, and removing elements of the image. |
| 14 | Now, select a character from the Characters tab.
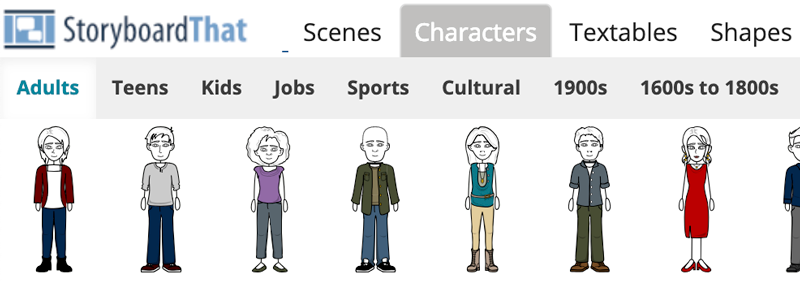
|
| 15 | Add your character to a panel by clicking and dragging the character directly on top of the panel. |
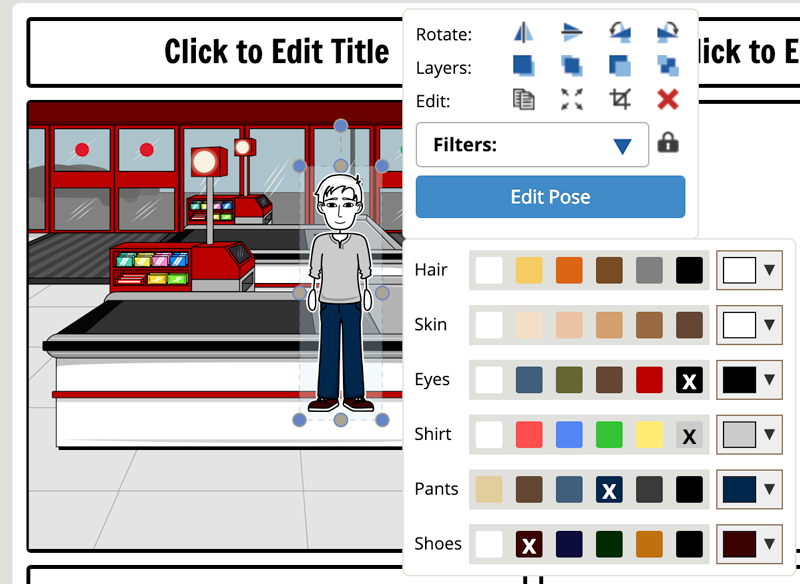
| 16 |
Now, customize your character by clicking it. You may customize a range of attributes, such as facial expressions, poses, clothing color, rotation, etc. |
| 17 | Now, select a speech bubble from the Textables tab.
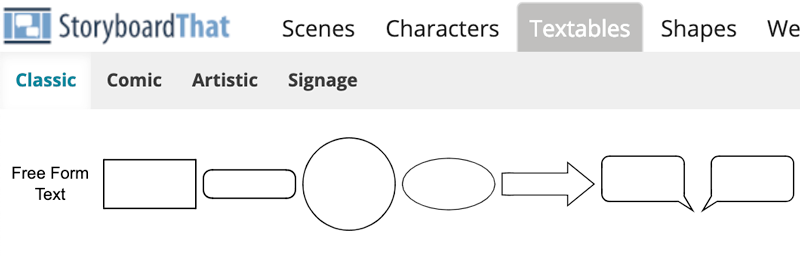
|
| 18 | Add your speech bubble to a panel by clicking and dragging the bubble directly on top of the panel. |
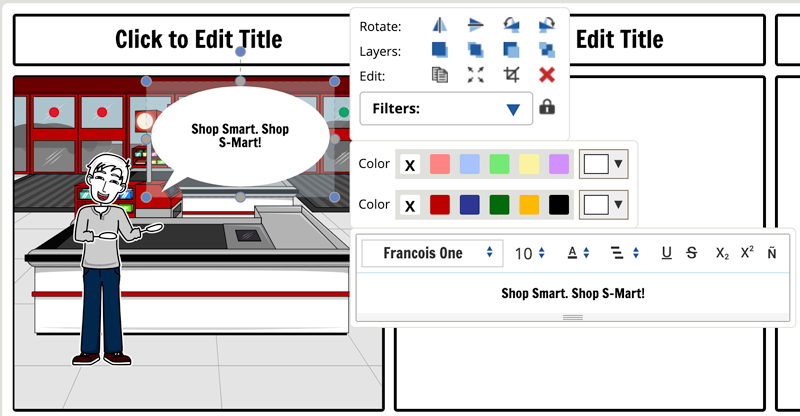
| 19 |
Now, customize your speech bubble by clicking it. You may customize a range of attributes, such as color, font, rotation, and various text effects. |
Now that you have begun adding content to your panels, you'll need to save your progress. This will prompt you to login, or create an account, if you hadn't already done so.
×
Save Regularly
Under the Free Account option, 'Autosave' is disabled. You should make sure to save regularly.
| 20 | Click the Save button.

|
| 21 | In the Save Dialogue that pops up click the Google button.

|
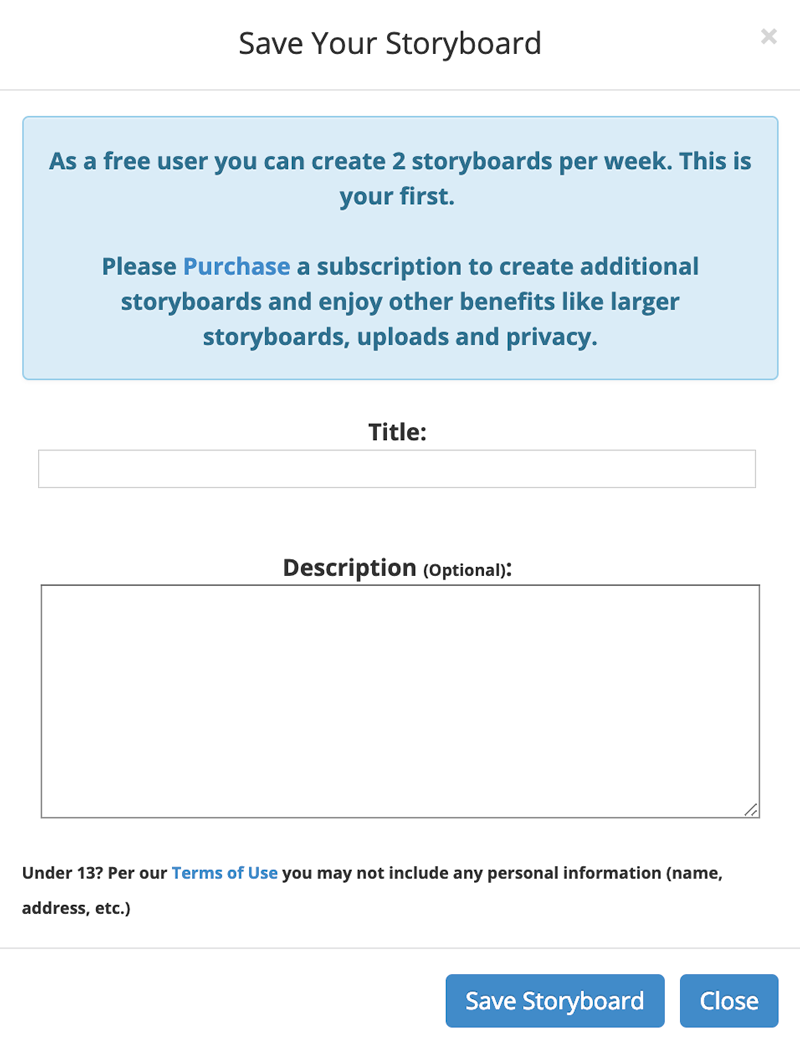
| 22 | Enter the metadata for your web comic, including Title and Description |
| 23 | From your browser's menu, click the File > Save button. |
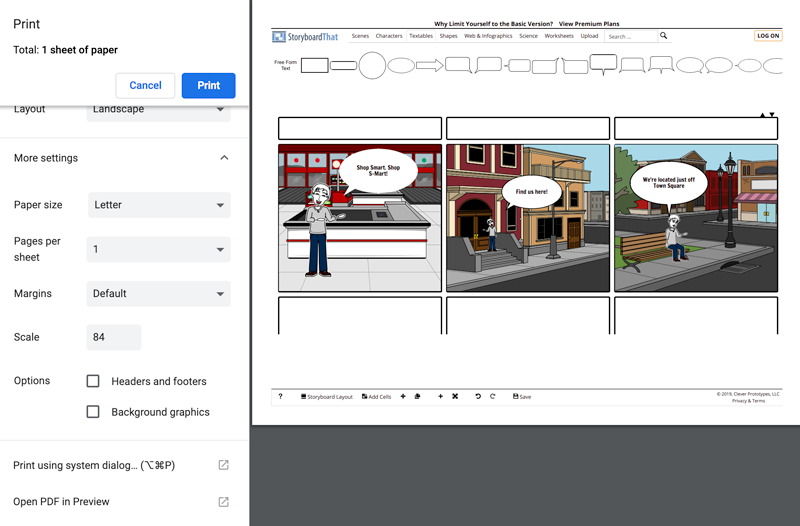
| 22 | Select your preferred options and click Print. |
Congratulations!
You've grown your multimedia literacy while creating cool things! Well done, you!
You might consider nominating work you are proud of to the Remix Project Showcase!

Example

Get Inspired
Explore examples of similar projects.
Tame Your Tools
Master the skills used in this project.
Get Help
Notre Dame has many helpful resources, including our Media Corps coaching staff, located in the Hesburgh Library.
Give Feedback
Remix is continually evolving. Please help us improve by providing feedback on this project or any other feature of Remix.