Mood Board
Curate visual elements to create a unique style and tone.
Mood boards are arrangements of visual elements such as images, colors, fonts, textures, patterns, descriptive language, and other visual elements which evoke a conceptual style, or mood. Mood boards are often used by designers to establish the unique visual language, style and tone of a brand. And creating a mood board is often a necessary first step in designing a media campaign which will tie together all the print and digital media through which you'll communicate a brand identity. In this project, you will gather a variety of assets which you feel strongly cohere to create a unique mood or style for an imaginary brand. You'll organize the assets together on a digital board you share to the cloud.
Canva- Style
- Brand
- Identity
Learning Goals
After you finish this activity you will be able to:
- Plan a mood board that evokes the desired style for a brand or design project
- Choose design elements that help convey a message to an audience
- Use software to develop a mood board that includes several kinds of content
- Share your mood board to the cloud
Follow these steps to complete the project.
To track your progress, click each step as you finish.
An excellent first step in creating any media work is to examine exemplary works of the same type. Make a list for yourself of what makes these examples strong and inspiring.
Don't skip this step!
| 1 | Peruse any or all of the links in the Get Inspired box. |
By growing your skills in the tools used in any project, you save yourself time and produce stronger work.
| 2 | Peruse any or all of the tutorials in the Tame Your Tools box. |
| 3 | Review the Mood Board Quality Checklist for a list of best practices. |
When beginning a new media project, it's best to organize your resources in a single location.
| 4 | Create a folder on your Desktop named something memorable, such as my-media-project. In this folder you'll organize all your resources for this project. |
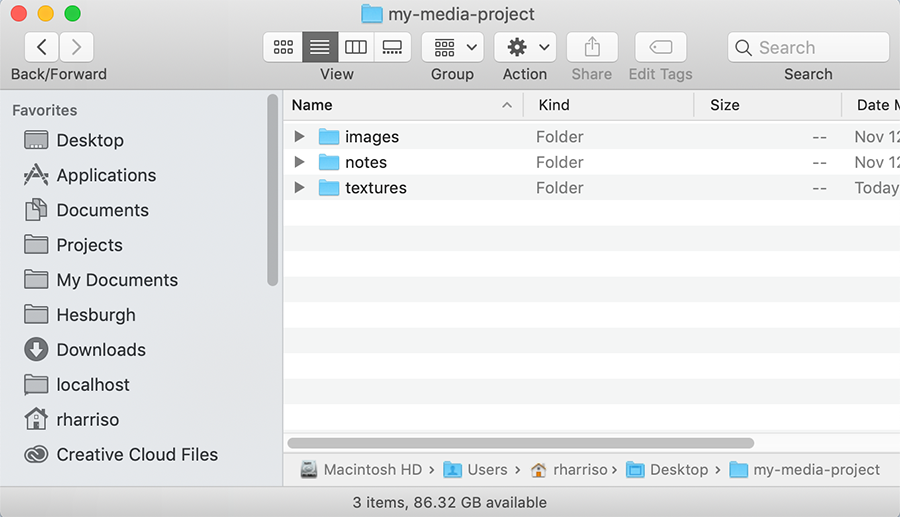
| 5 | Next, create images, textures, and notes sub-folders for the raw materials you'll use to create your mood board. |
Alternate File Storage
You may also organize your documents in cloud storage, such as Box or Google Drive.
Begin by gathering a large number of images that represent or are related to your subject/brand. You'll select from this larger pool of images when choosing the final few images for your board. However, at this stage, don't limit the number of images you collect.
| 6 |
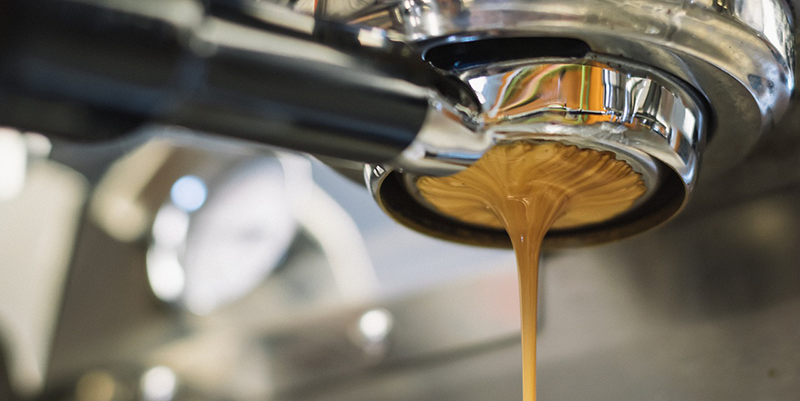
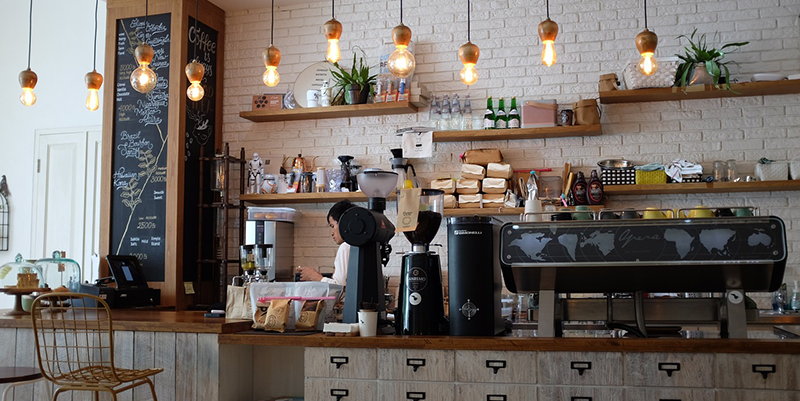
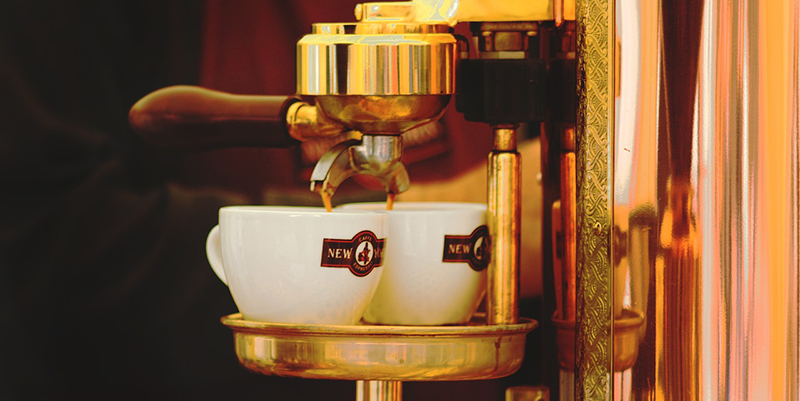
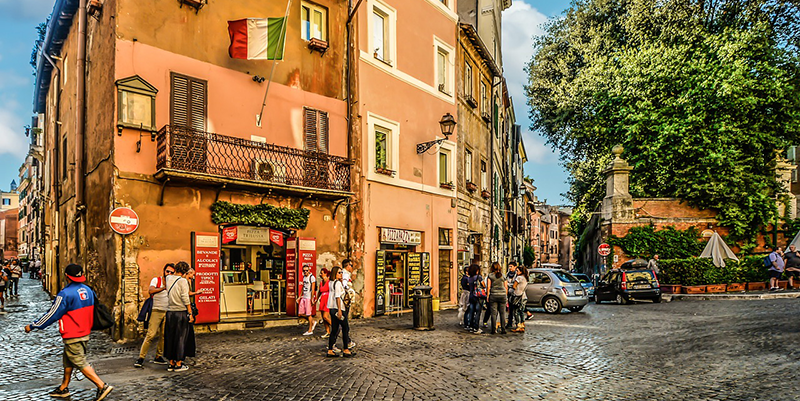
Search Google Images for photos, illustrations or paintings, and images of textures (e.g., wood or marble) which represent your subject/brand. For example, if your subject/brand is ‘authentic Italian cafe’, you might search for people, places and things associated with it:
Save these images to your images subfolder. |
| 7 |
Next, examine the images you've collected. What textures do you find in the images? For example, in Italian cafés, you might find marble, distressed wood, and brass or copper metals. Once you identify at least 3 textures, search for images of them on google image search. Save these texture images to your images subfolder. |
If you already have a rough idea of the color palette you want, you may save yourself time by gathering images reflecting that same palette. For example, note the difference between Palettes A and B, below:
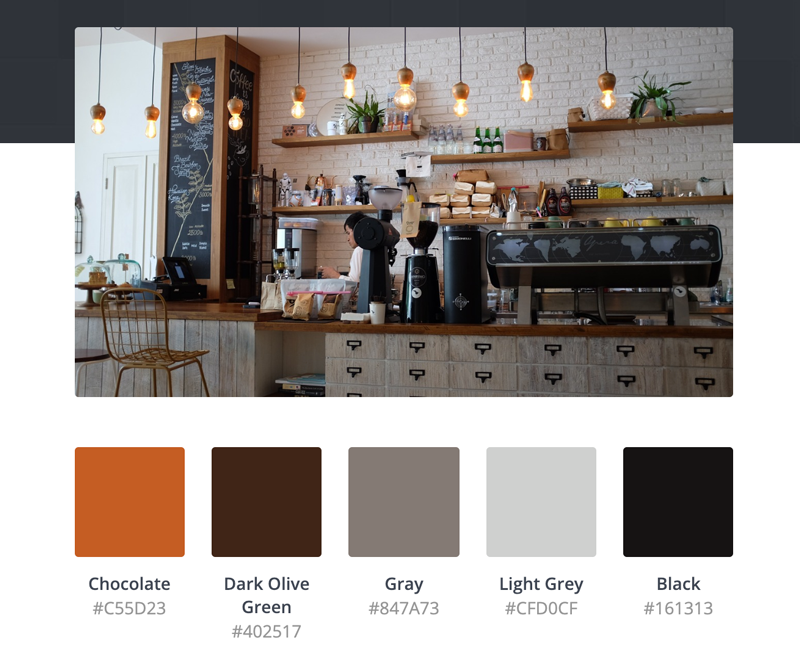
As you have gathered images, a rough color palette has likely emerged. In this step, you'll choose a few representative images from the image pool and use Canva to generate a 5-color palette.
| 8 |
Select an image from your pool of images which best represents that palette. Visit the Canva Color Palette Generator. Click the Upload an Image button. Canva will generate a palette based on the colors in the image. |

| 9 |
Repeat this process with multiple images until you find the colors that best express your brand identity. For more information on developing a strong color palette, read How to Create Your Own Color Schemes. |
| 10 |
Make sure to take a screen capture of your results or write down the 6-character Hex value for each color in your palette. For example: ‘Dark Olive Green’ is listed as ‘#402517’ in HEX. |
In this step, you'll find and download up to 5 icons that express your subject/brand identity. Read How to Choose Effective and Attractive Icons in Your Designs to learn best practices in selecting icons.
| 11 |
Login to Flaticon.com. You may search for icons individually, though icon packs will offer greater unity between icons. |

| 12 |
Select Free download when downloading any icon or icon pack with the Save your icons in your images subfolder, and don't forget to credit the author. |
In this step, you'll brainstorm up to 5 terms or short phrases which you feel perfectly evoke your brand.
| 13 | Let's brainstorm! Use the list creator below to make a list of terms—adjectives, nouns, gerunds, adverbs, short phrases, etc. At this stage, come up with as many as you can. Later, you'll choose a final five from this list to add to your mood board. |
| 14 | Save your list of terms to your notes subfolder. |
Now that you've gathered images, textures, icons, a color palette, and brainstormed up to 5 evocative terms, you'll login to Canva and create your mood board.
| 15 |
Sign Up for a Canva account. Or Sign In, if you already have one. |
| 16 |
Create a blank mood board canvas (from the photo collage template). |
| 17 |
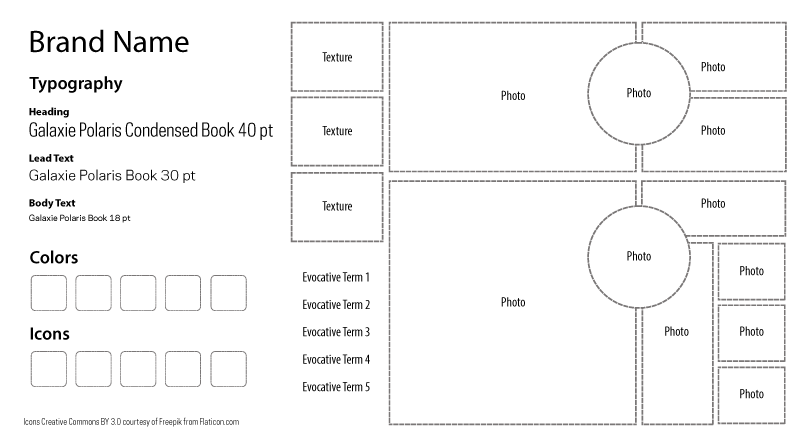
There is no single correct way to structure a mood board. We recommend you avoid selecting a pre-built template and instead start with a blank canvas. For inspiration, peruse the examples in the Get Inspired box, above, or consider using the template below. |
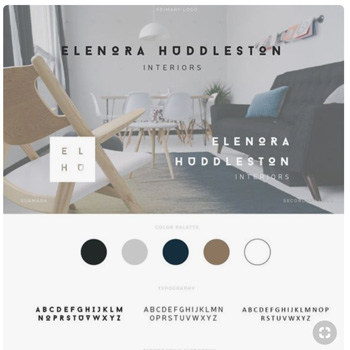
If you're overwhelmed by the variability of mood board designs, you may wish to use the following template as a guide to structure your page:

In this step, you'll upload your photos (including texture images), and icons to the Canva library. You'll then structure your page using frames and fill the frames with your chosen photos.
| 18 |
In Canva, first select the Uploads |
 tab. Open your images
subfolder and drag all of your photos, textures, and fonts into the library.
tab. Open your images
subfolder and drag all of your photos, textures, and fonts into the library.
| 19 |
Select the Elements |
| 20 |
Select the Uploads Repeat this process until you've placed all your images and textures. |
 tab. View the Frames section by clicking All
>. Drag differently shaped frames onto the right side of your canvas one-by-one. Arrange and re-arrange them varying their sizes and order until you are satisfied with the layout.
tab. View the Frames section by clicking All
>. Drag differently shaped frames onto the right side of your canvas one-by-one. Arrange and re-arrange them varying their sizes and order until you are satisfied with the layout.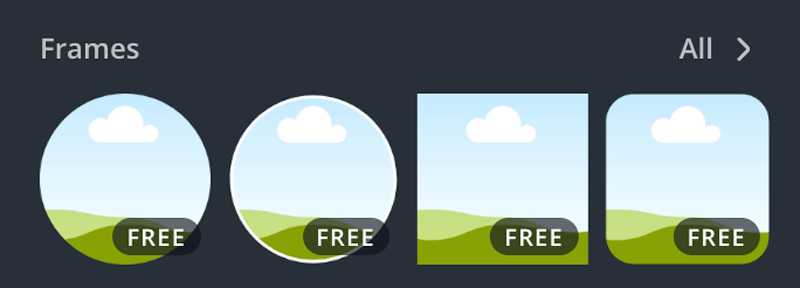
In this step, you'll add all your textual elements, including your headings, fonts, evocative terms. If you need a reminder of the rough structure of the canvas, see our example template (step 17).
| 21 |
Select the Text |
| 22 |
Add a heading for the name of your subject/brand to the top left corner. |
| 23 |
Add subheadings for typography, colors, and icons below your heading. |
| 24 |
Select a textual element on your canvas and select the fonts dropdown menu to set its font. Choose fonts you feel are evocative of the subject/brand. Add the names and sizes of your fonts, set in their respective font faces and sizes. |
 tab.
tab.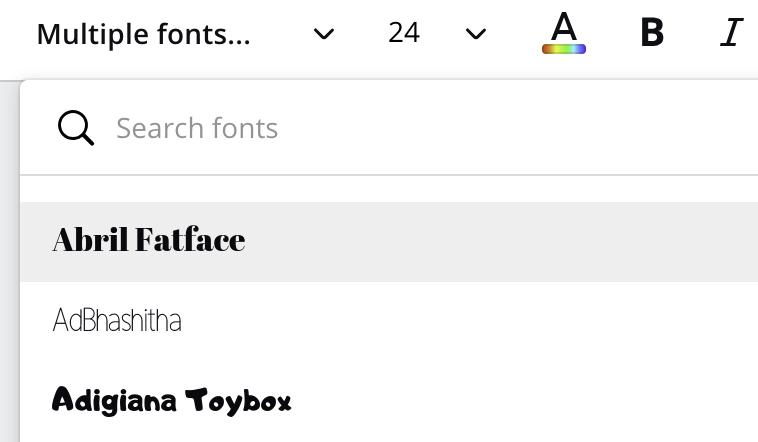
| 25 |
Add your 5 evocative terms in the bottom right corner next to the image grid. Optionally, you may style these by assigning them fonts which visually match or evoke their meaning. |
In this step, you'll add the 5 colors from your color palette to your canvas.
| 26 |
Select the Elements |
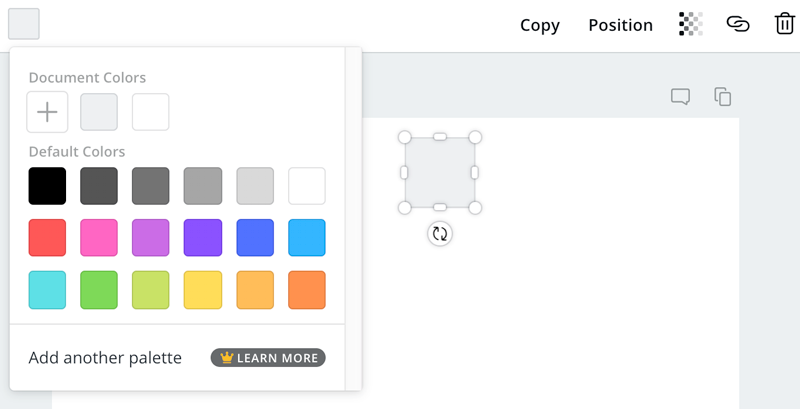
| 27 |
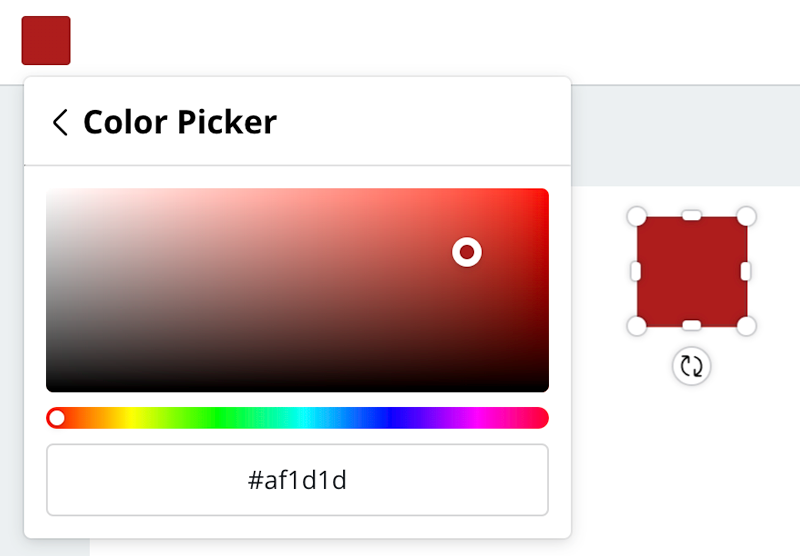
With the shape selected, click on the corresponding shape in the top left corner of the canvas to open the color palette window. |
| 28 |
Now, click on the plus icon |
| 29 |
Repeat this step for each of the colors on your palette. |
In this step, you'll add to your canvas the 5 icons you feel best represent your subject/brand.
| 30 |
select the Uploads |
| 31 |
Drag each of your icons to the canvas. Size and place it according to your needs. We recommend placing them directly below, and aligned under, the five colors from your color palette. |
In this step, you'll share your mood board with others, by sending them a link to view or edit your project via email.
| 32 |
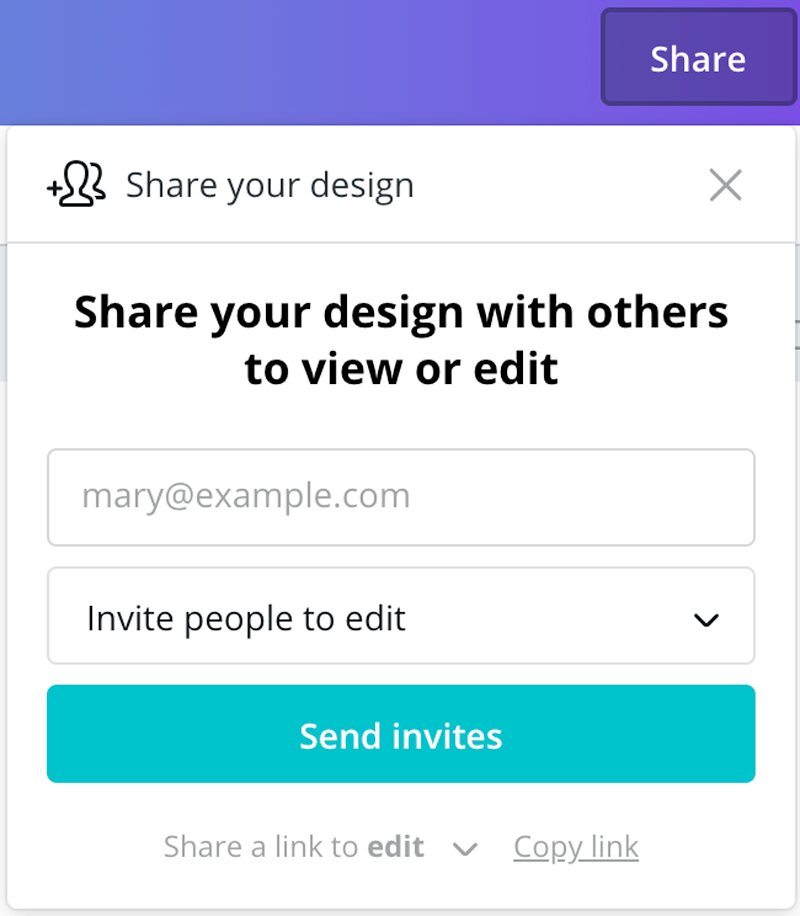
Click the Share button to open the sharing dialog. |
| 33 |
In the email field, enter the email of the person you intend to share your mood board with. |
| 34 |
Select the dropdown menu directly below and invite your recipient either to edit or simply view your mood board. |
×
Additional Sharing Options
Canva offers many more ways to share your project, including presenting it on screen, publishing it to social media, embedding it within a webpage, or downloading and printing and/or emailing it
directly to colleagues.
Congratulations!
You've grown your multimedia literacy while creating cool things! Well done, you!
You might consider nominating work you are proud of to the Remix Project Showcase!

Example
Get Inspired
Explore examples of similar projects.
Tame Your Tools
Master the skills used in this project.
Get Help
Notre Dame has many helpful resources, including our Media Corps coaching staff, located in the Hesburgh Library.
Give Feedback
Remix is continually evolving. Please help us improve by providing feedback on this project or any other feature of Remix.
Mood Board Template