Interactive Timeline
Plot an historical event along an interactive visual timeline.
A timeline is a graphic representation of the linear passage of time, listing key events across a specific range of dates. Most timelines follow an evenly distributed scale, although in some cases it can be more effective to use a logarithmic scale where time is compacted at one end or the other. A timeline can also have parallel tracks that show different kinds of content. Timelines are particularly popular in the field of history and in the natural sciences. In this project, you will gather information on a number of related moments from a particular historical event, plotting them along a digital timeline you share to the cloud.
TimelineJS- History
- Interactive
- Storytelling
Learning Goals
After you finish this activity you will be able to:
- Map an event of historical significance into discrete events which demonstrate a clear causal relationship
- Gather multiple media related to each event
- Embed the media into an interactive digital timeline and share it online
Follow these steps to complete the project.
To track your progress, click each step as you finish.
An excellent first step in creating any media work is to examine exemplary works of the same type. Make a list for yourself of what makes these examples strong and inspiring.
Don't skip this step!
| 1 | Get inspired by visiting the links in the Get Inspired box. |
By growing your skills in the tools used in any project, you save yourself time and produce stronger work.
| 2 | Peruse any or all of the tutorials in the Tame Your Tools box. |
When beginning a new media project, it's best to organize your resources in a single location.
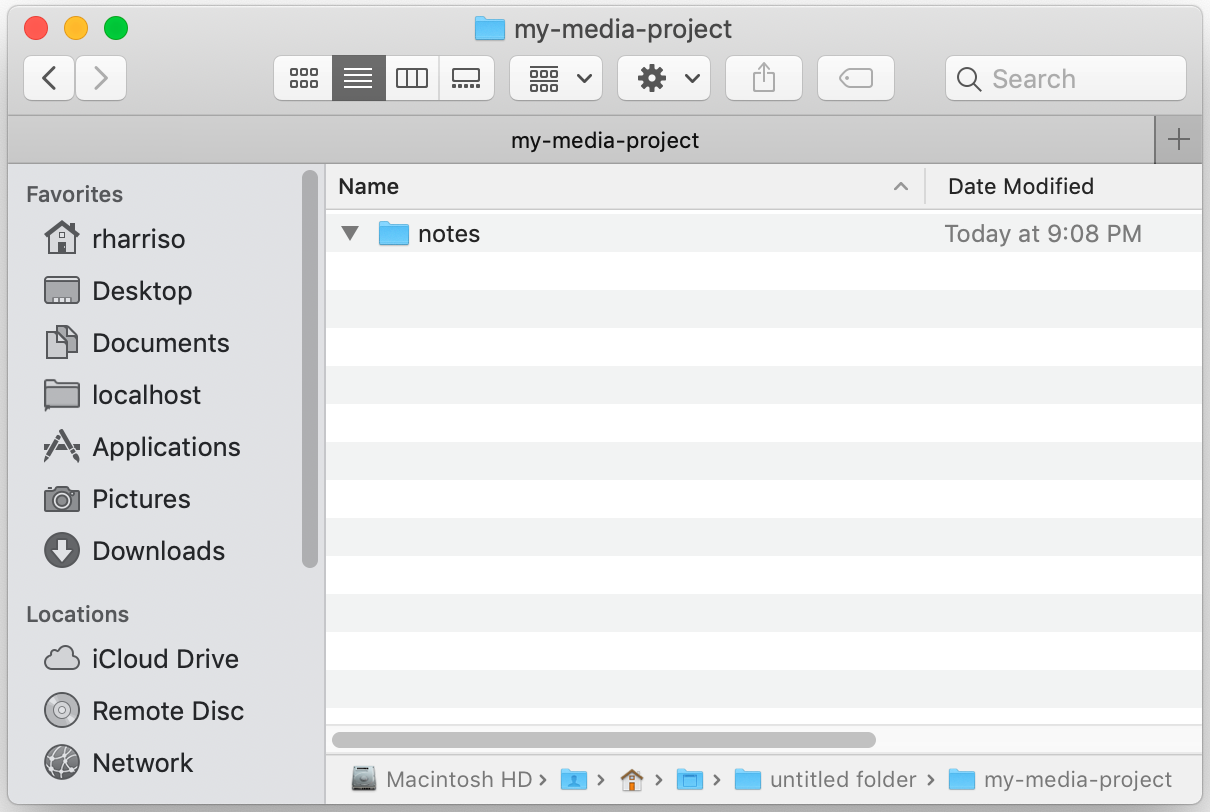
| 3 | Create a folder on your Desktop named something memorable, such as my-media-project. In this folder you'll organize all your resources for this project. |
| 4 |
Create a subfolder in your project folder called notes. Create a document for storing your historical dates, their media types and the URLs for accessing them. |
Alternate File Storage
You may also organize your documents in cloud storage, such as Box or Google Drive.
Next, you must select a historical event and map it into discrete moments that you'll dispaly with various media types.
| 5 |
Carefully consider the purpose of your timeline. If not covering the whole event, what specific period of time will your timeline cover? What various types of media will you use to tell the story of this event as a series of moments? TimelineJS supports many media types, such as:
|
| 6 |
For each moment of your event you wish to portray, you must decide on the media type to portray it, and gather and/or generate the following information about it:
Create a document for gathering and organizing your events, dates, and media. We recommend something like our Timeline Event Organizer Document. |
×
How many Moments should you include?
There is no limit to the number of moments you may include, but you may wish to let the audience, rhetorical situation, and the length specified in the assignment prompt suggest the right number of
moments to include.
In the next steps you'll create your own TimelineJS spreadsheet from the KnightLabs template.
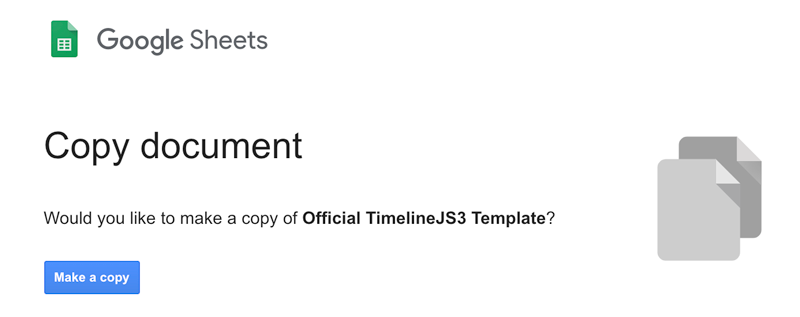
| 7 |
Follow this link to Copy the TimelineJS spreadsheet template. |
| 8 |
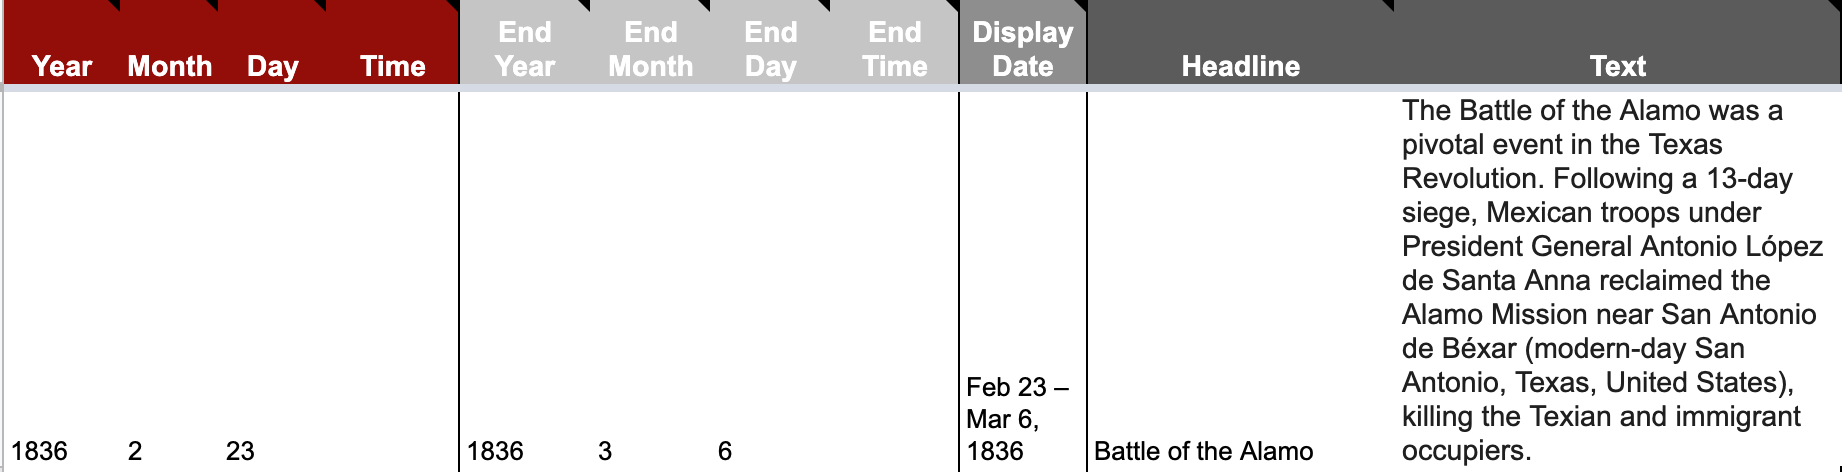
If you haven't already done so, watch the Tutorial on editing the TimelineJS template. Inside the template, add the data for each of the moments of your historical event onto a separate row. You may wish to change the spreadsheet title from "Copy of Official TimelineJS Template" to something more meaningful to you. |
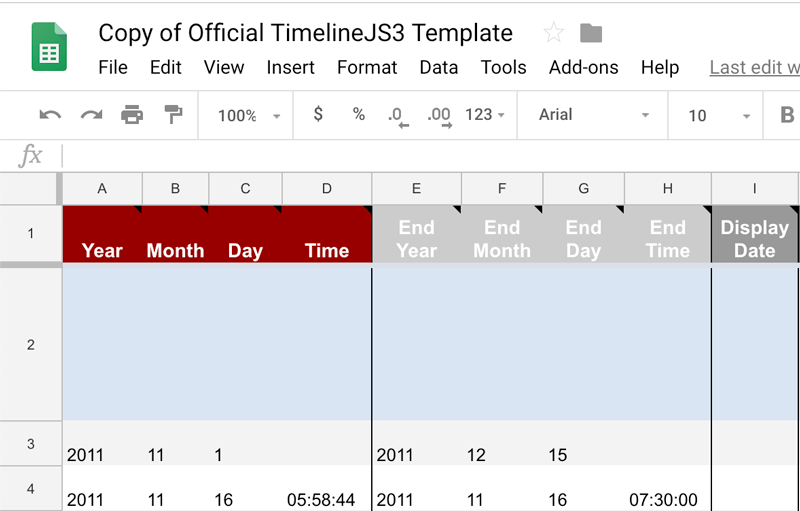
Be careful not to leave empty rows in the middle of your data.
In this step, you'll enter the data for the images you'll include. In this example, we'll search the Internet Archive, but you may search any number of image providers, as long as the image has a URL that is accessible to the public.
| 9 |
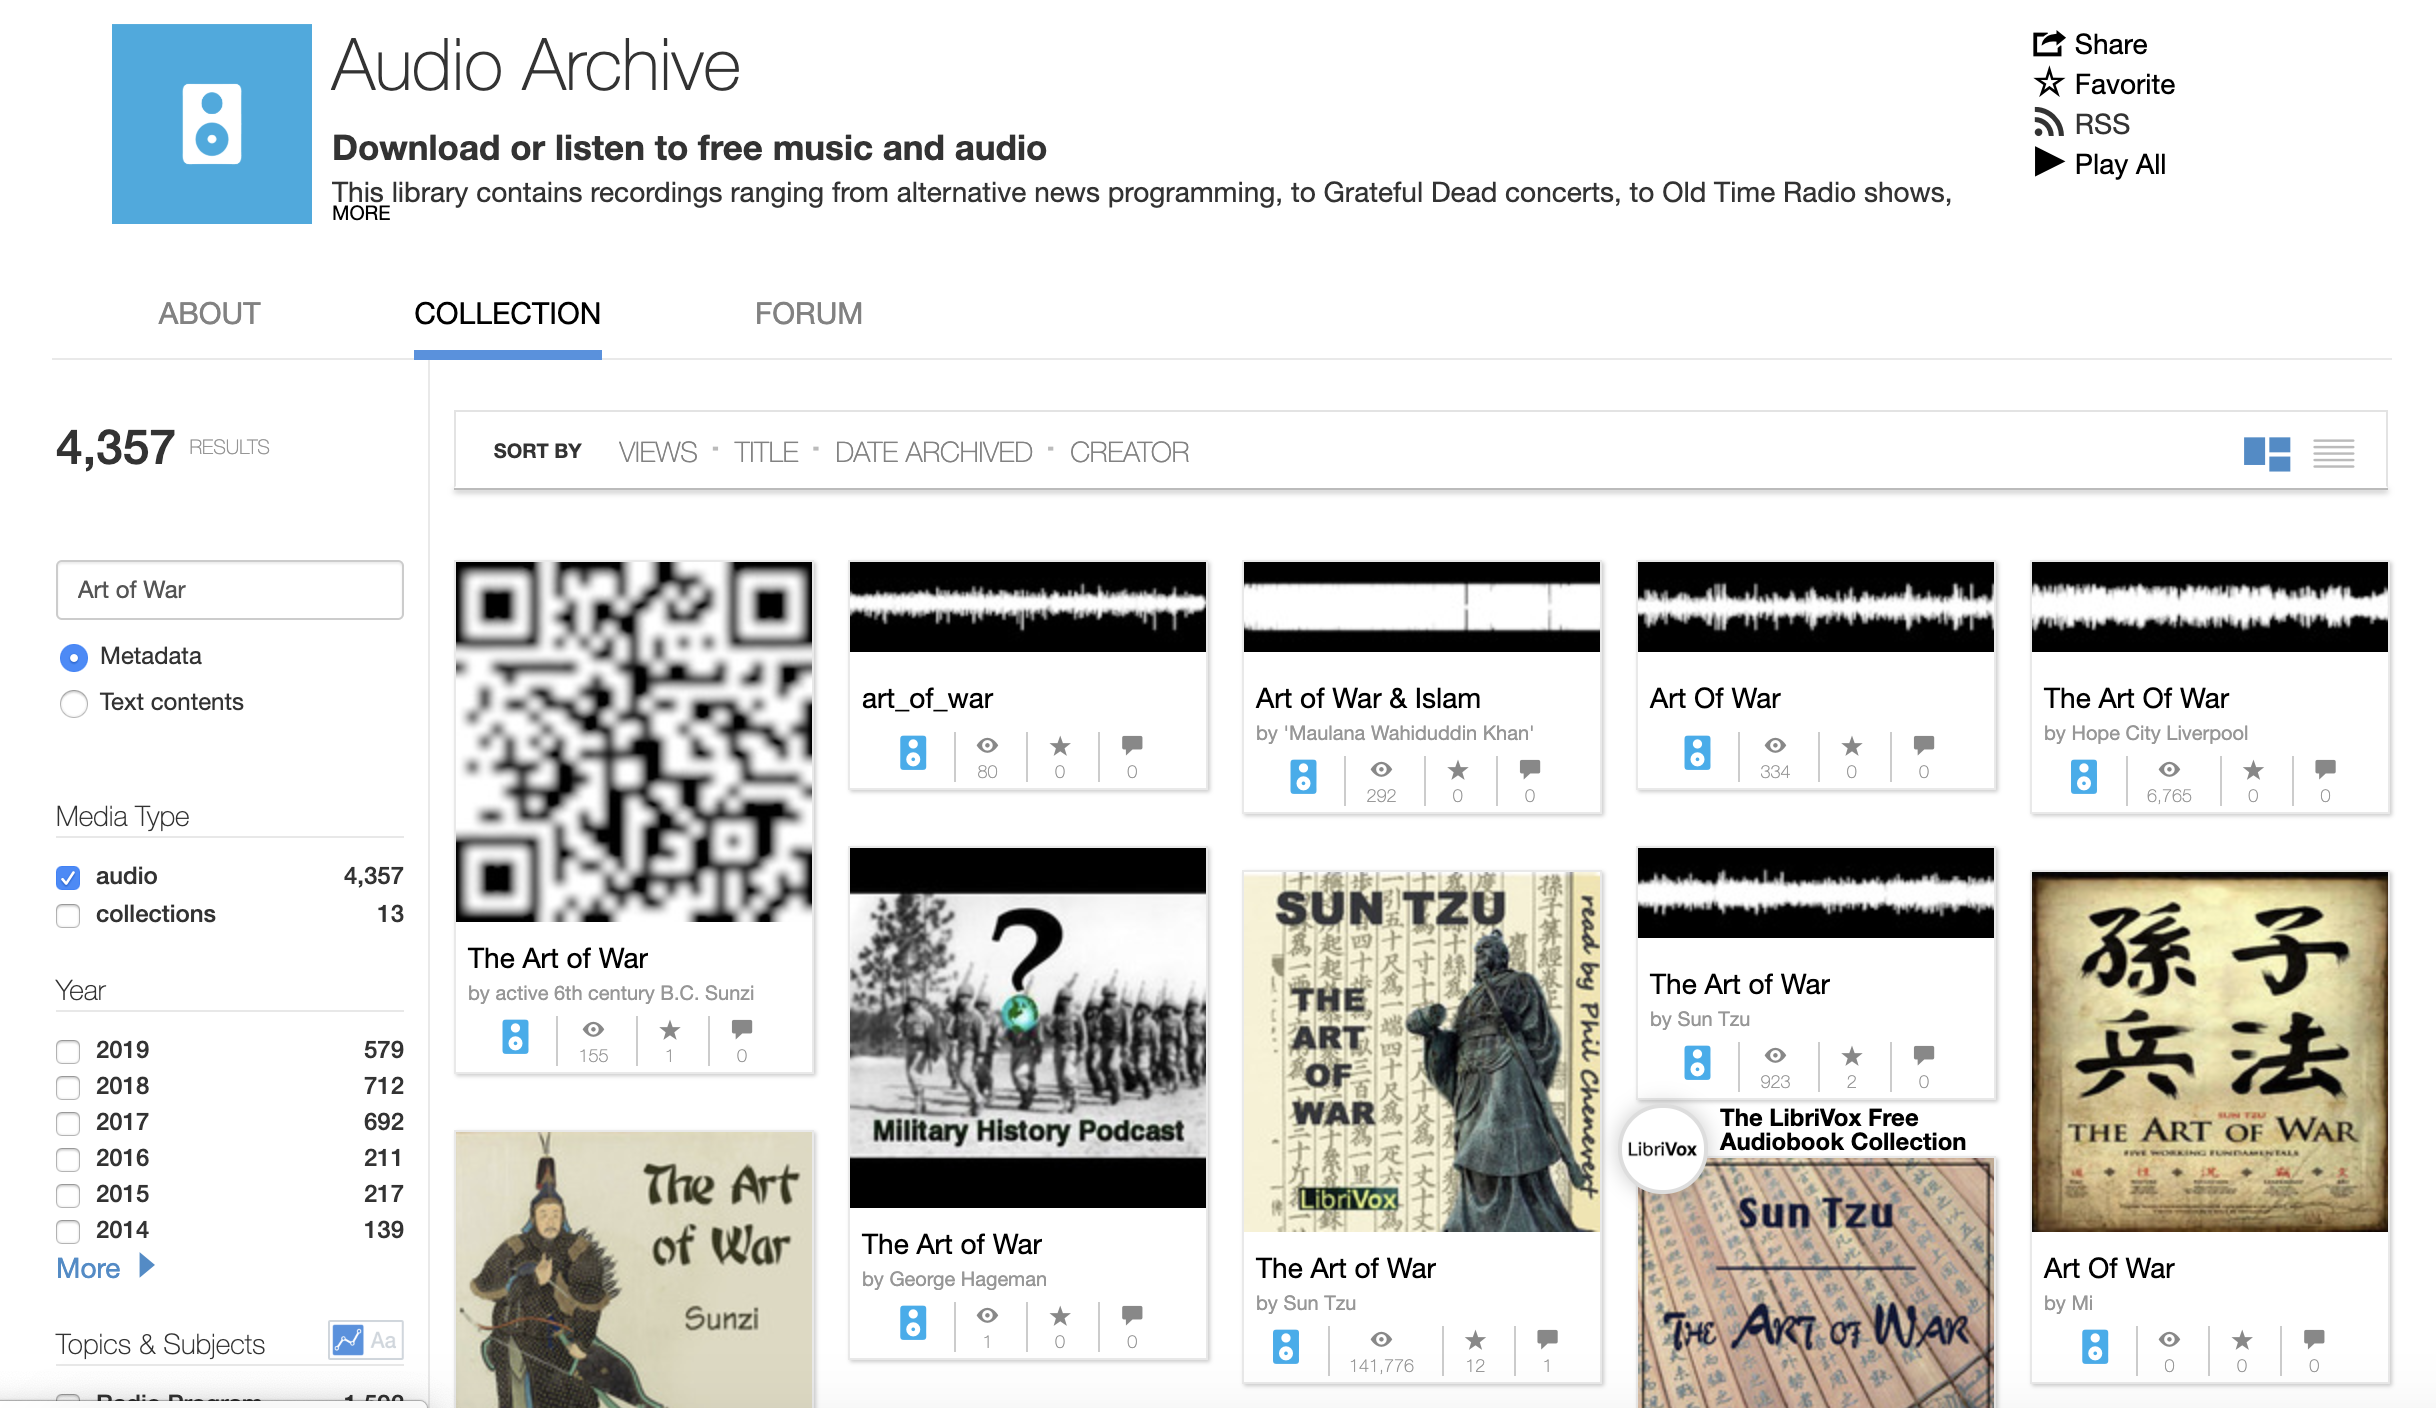
In a browser, navigate to the Internet Archive's image collection. Perform a search for images on your event or topic. Use the faceting at left to filter and focus your results. |

| 10 |
Click on any card from among the returned results to open its information page. |
| 11 |
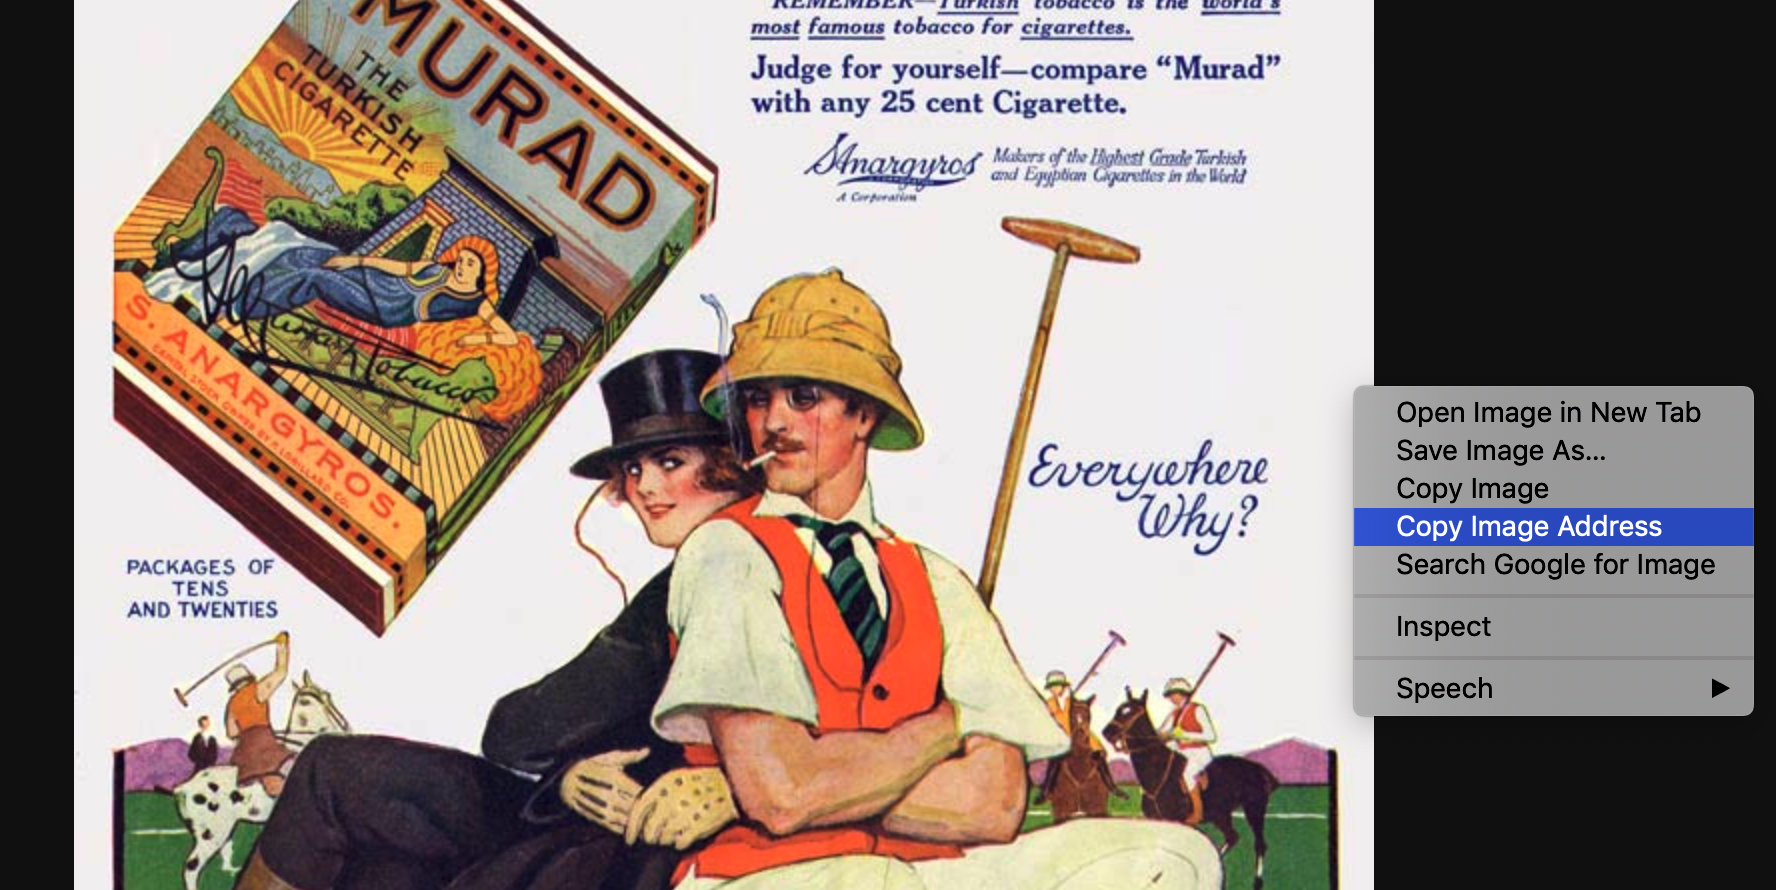
Click on the image itself to view the image full-sized. |
| 12 |
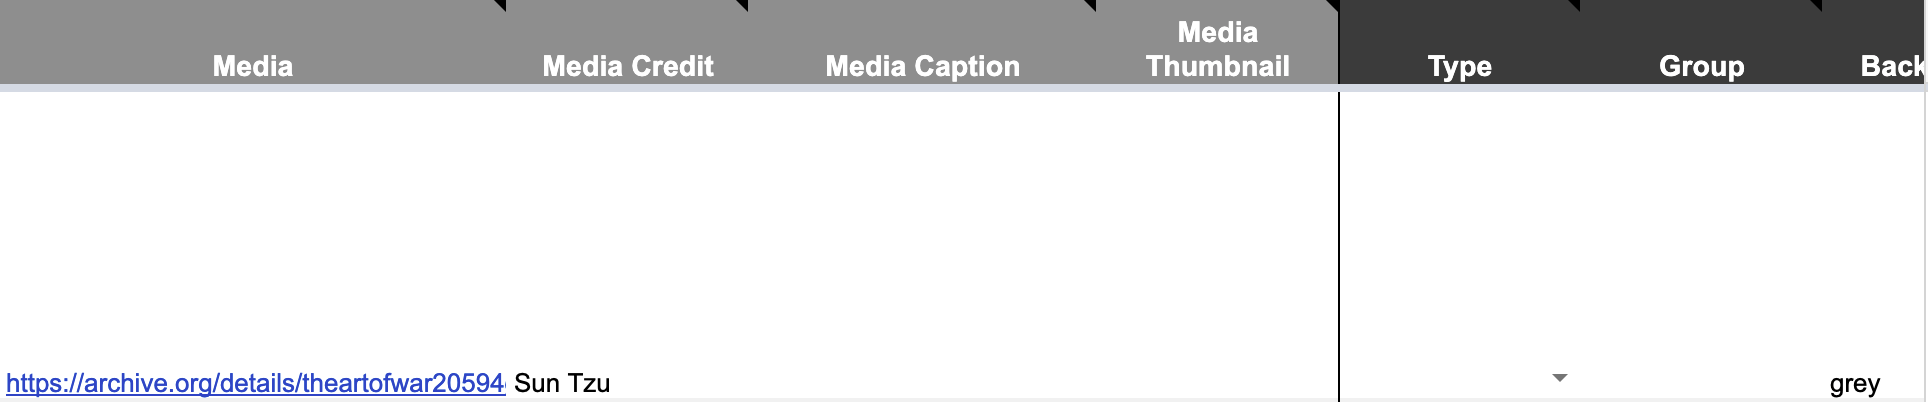
Right-click on the image to obtain the URL address of the image. You may also copy the URL from your browser's URL bar. |
| 13 |
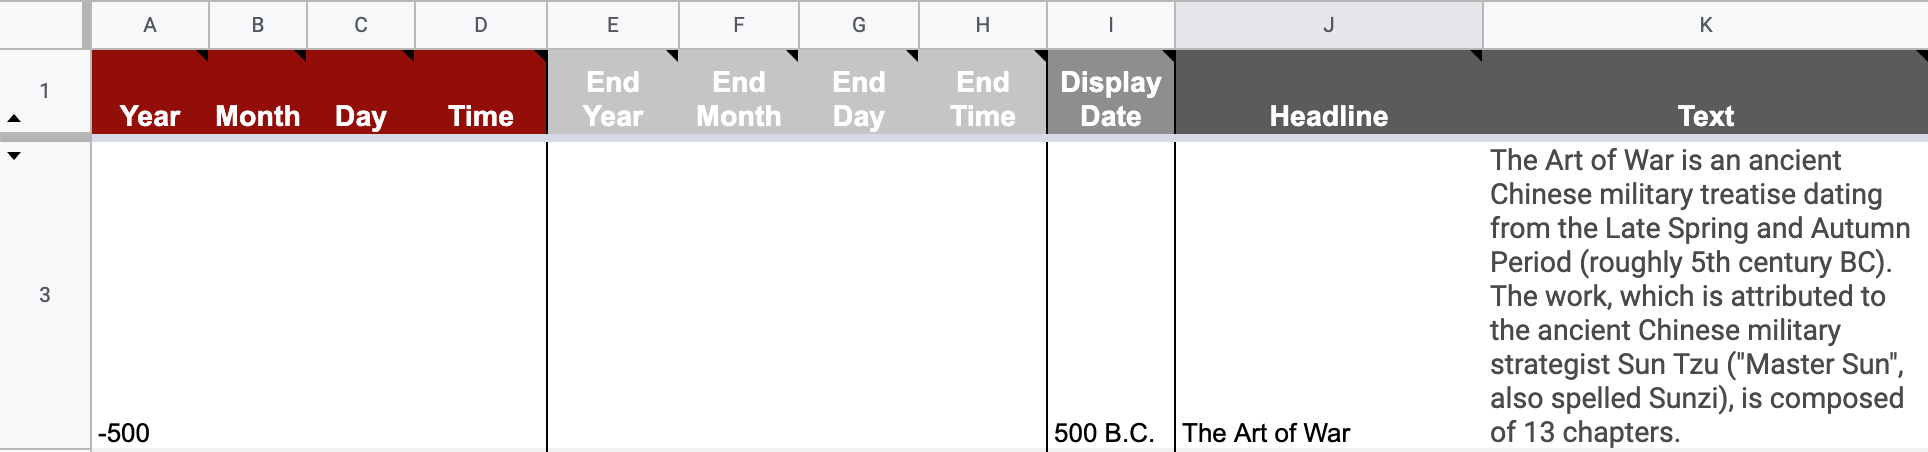
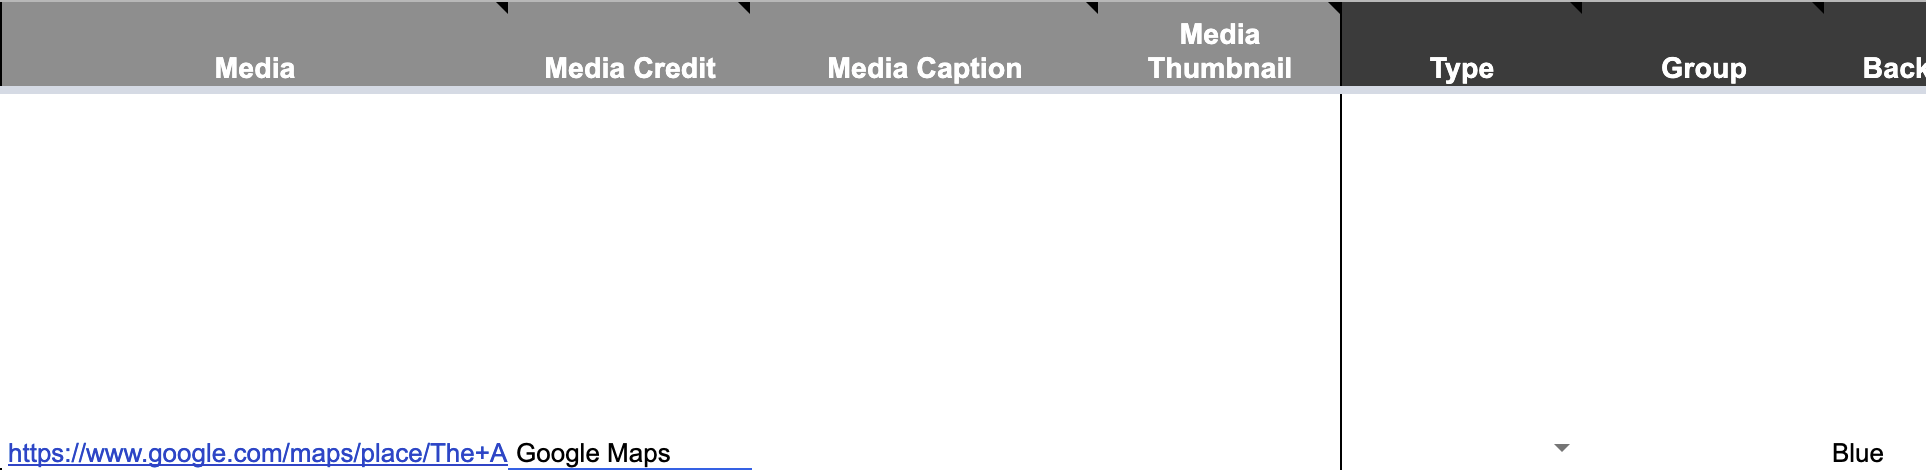
Record the metadata for your image in the timeline spreadsheet. |


|
Repeat this step until you have recorded data for all (or most) of the images you plan to use in your timeline. |
In this step, you'll enter the data for the audio files you'll include. In this example, we'll search the Internet Archive, but you may search any number of audio providers, as long as the audio file has a URL that is accessible to the public.
| 14 |
In a browser, navigate to the Internet Archive's audio collection. Perform a search for audio on your event or topic. Use the faceting at left to filter and focus your results. |
| 15 |
Click on any card from among the returned results to open its information page. |
| 16 |
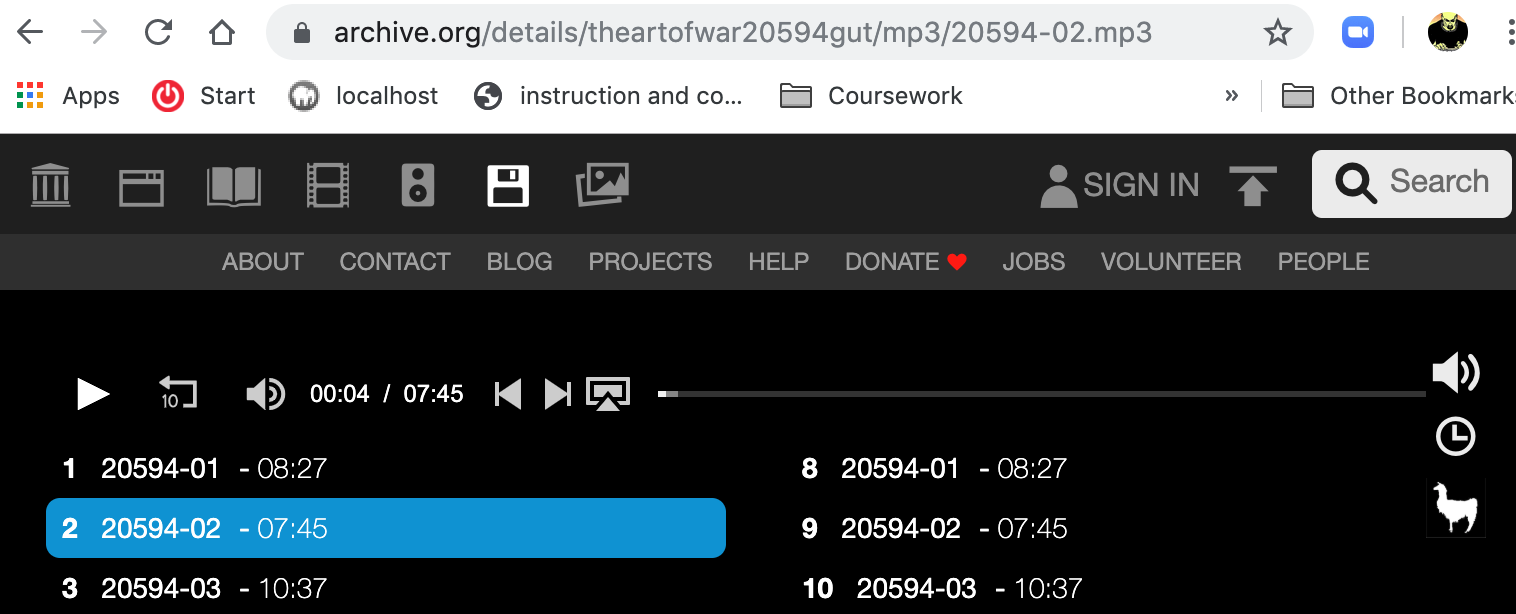
Play the sound file to preview it. When satisfied with your choice, copy the URL from your browser's URL bar. |
| 17 |
Record the metadata for your image in the timeline spreadsheet. |
|
Repeat this step until you have recorded data for all (or most) of the images you plan to use in your timeline. |
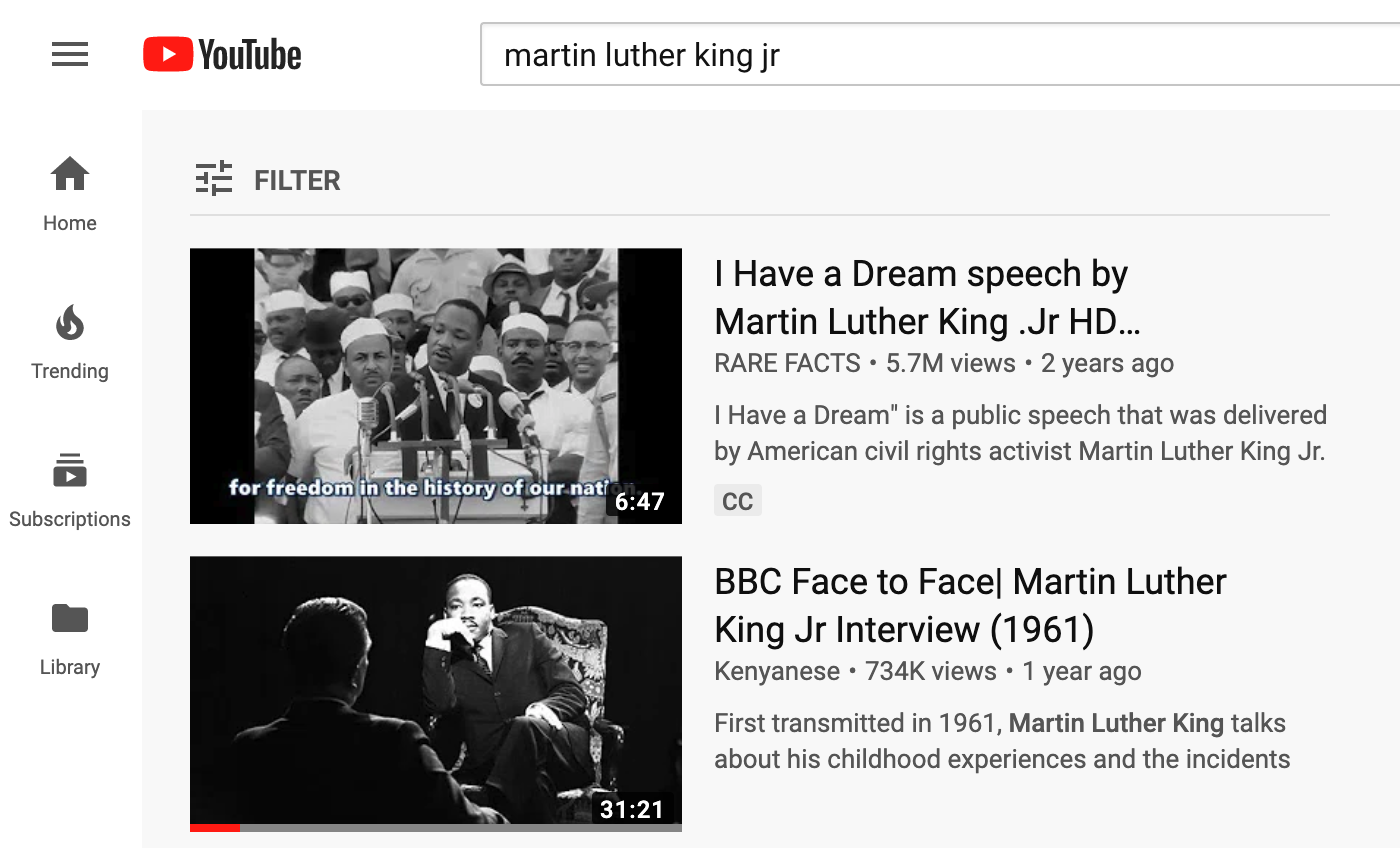
In this step, you'll enter the data for the video files you'll include. In this example, we'll search the YouTube, but you may search any number of audio providers, as long as the audio file has a URL that is accessible to the public.
| 18 |
In a browser, navigate to YouTube. Perform a search for video on your event or topic. Use the faceting at left to filter and focus your results. |
| 19 |
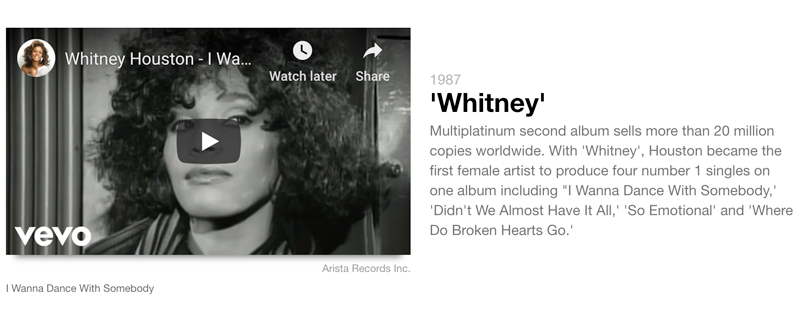
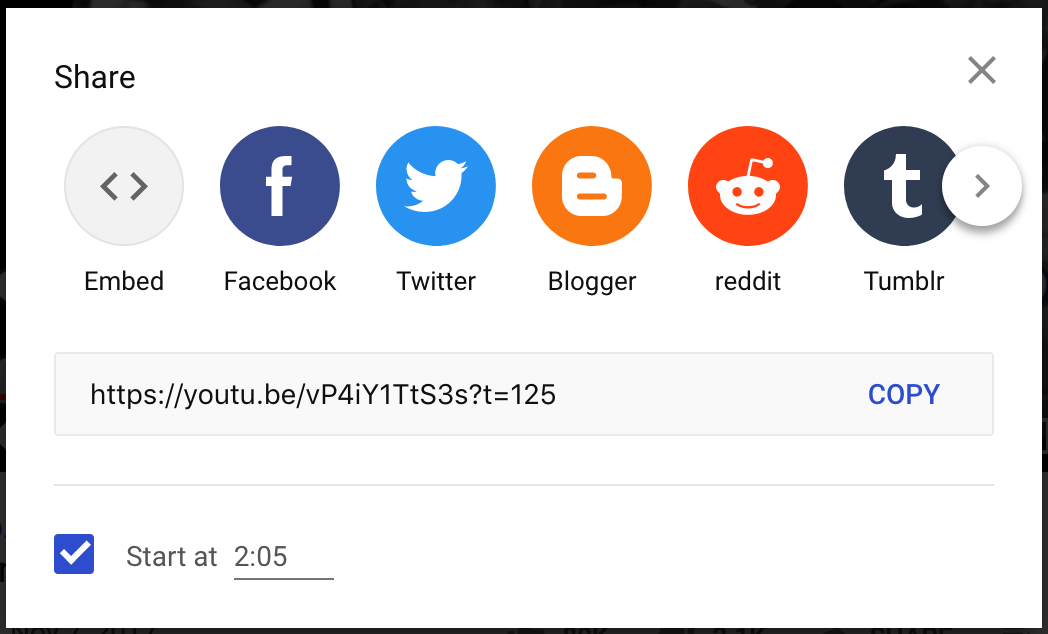
Click on the video to open its information page. |
| 20 |
Click on the share icon ( ) beneath the video and copy the link provided. Optionally, select the checkbox to set a specific starting time for the video to begin. Note: Make sure to hit the tab key to update the URL if you update the time field directly. |
| 21 |
Record the metadata for your image in the timeline spreadsheet. |


|
Repeat this step until you have recorded data for all (or most) of the images you plan to use in your timeline. |
In this step, you'll enter the data for any Google Map files you'll include.
| 22 |
In a browser, navigate to Google Maps. Perform a search for a particular location. |
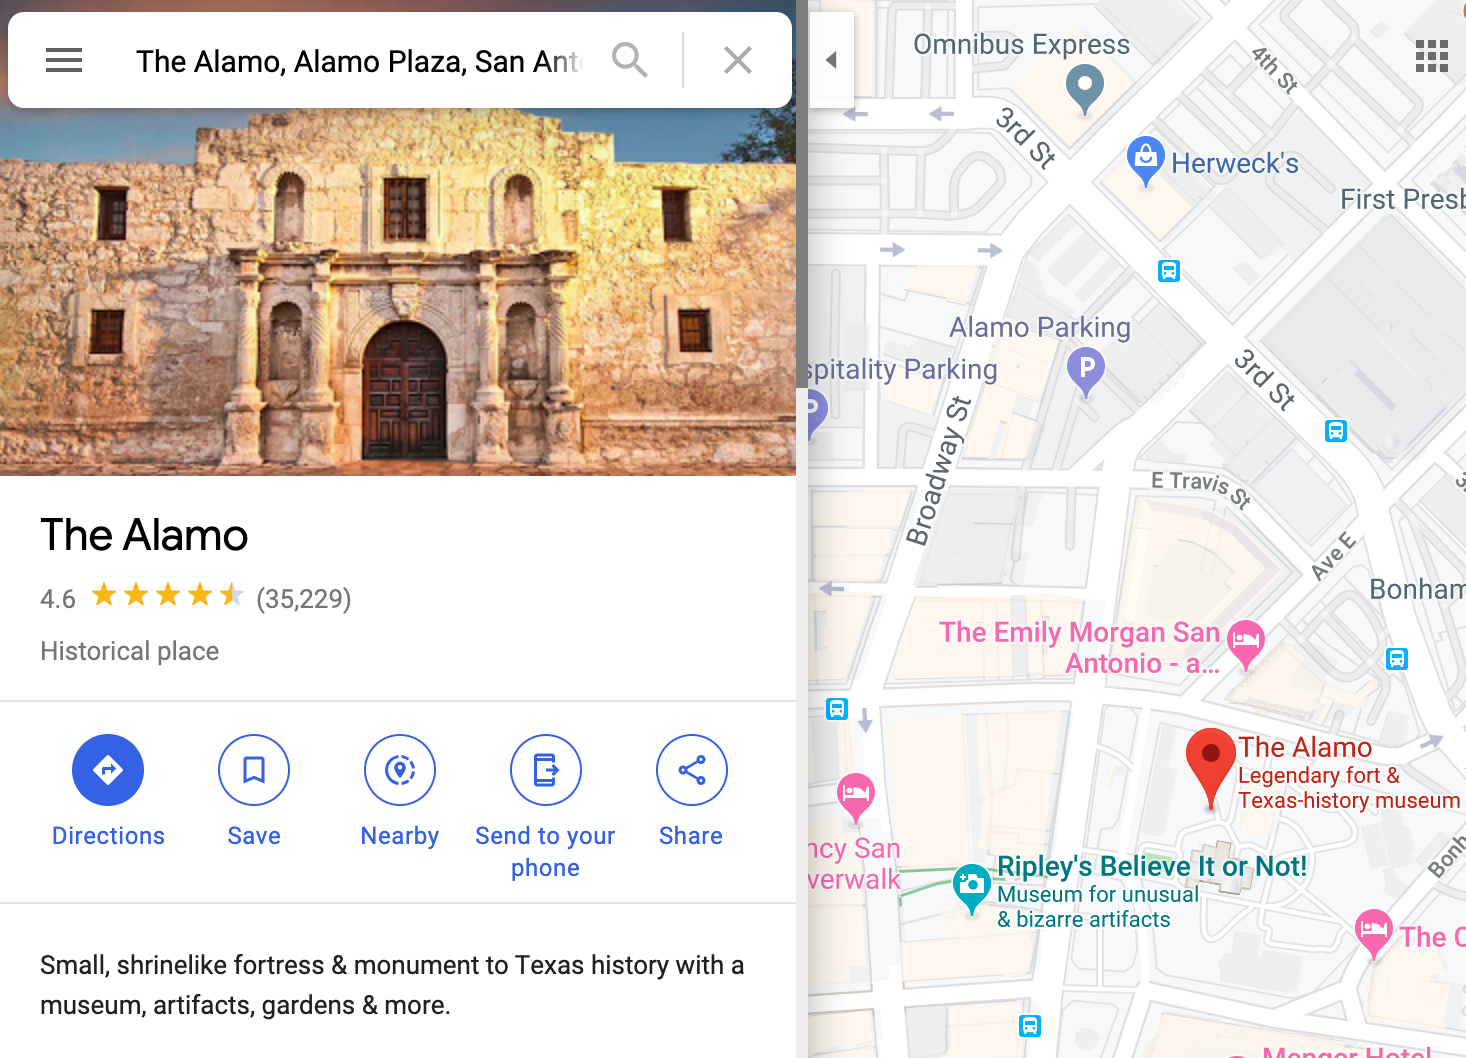
| 23 |
Click on the share icon ( ) in the search results details pane. |
| 24 |
Click Copy Link to capture the URL for your timeline spreadsheet. |

| 25 |
Record the metadata for your image in the timeline spreadsheet. |
|
Repeat this step until you have recorded data for all (or most) of the Google Maps you plan to use in your timeline. |
Once you have entered each of the moments for your event, you will need to publish your spreadsheet to the Web.
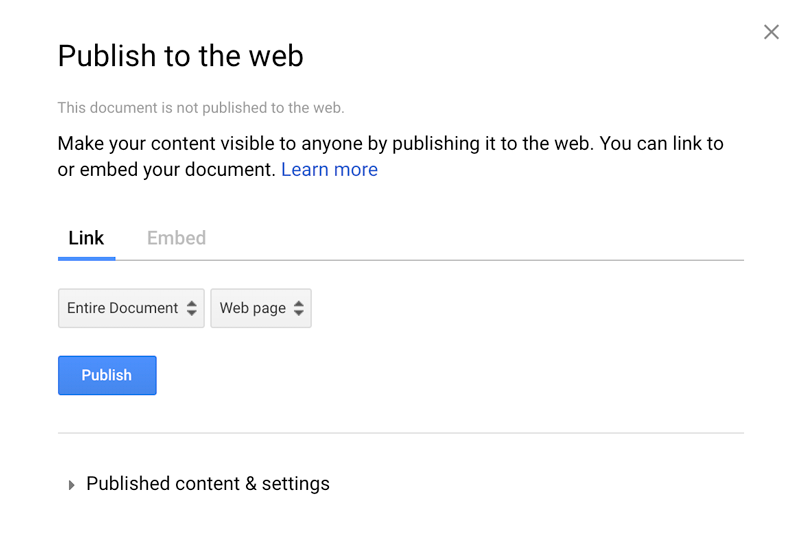
| 26 |
Select File > Publish to the web... from the Google Sheets menu. In the window that opens, click the Publish button. You may then close the publish window. |
Now you will set the options for your timeline.
| 27 |
Copy the entire URL of your spreadsheet from the URL bar at the top of your browser. |

| 28 |
Return to Step 3 on the TimelineJS website and paste the URL you just copied into the Google Spreadsheet URL field to generate the timeline. |

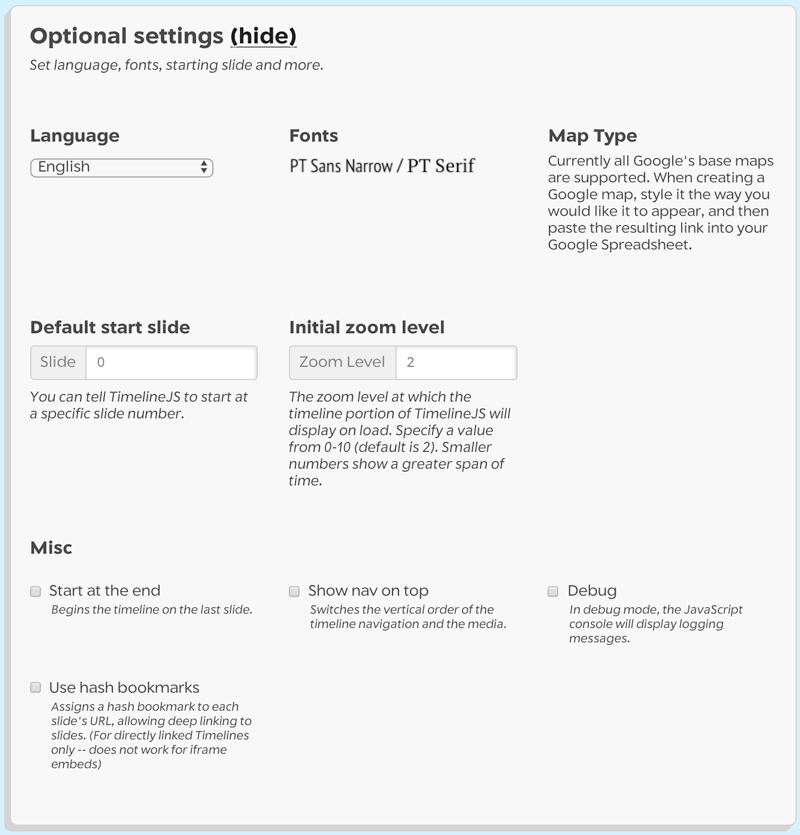
| 29 |
Next, click the Optional Settings (show) to set additional formatting options. |
You will want to preview your timeline before sharing or embedding it.
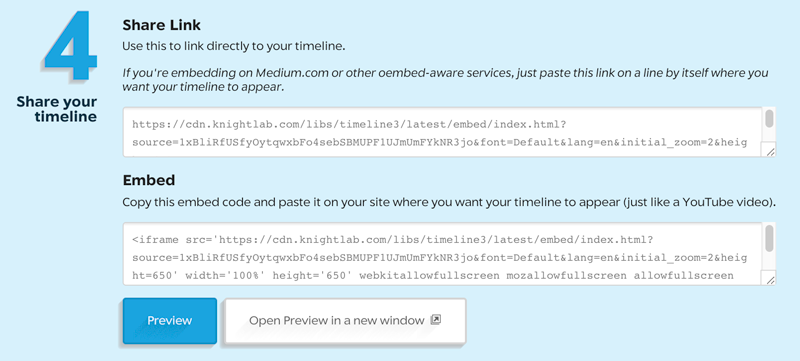
| 30 |
You may now preview your timeline by Navigating to step 4 and clicking clicking the Preview button. |
| 31 |
Once you are satisfied with your timeline, you may copy the link to Share your timeline, or copy the |
Congratulations!
You've grown your multimedia literacy while creating cool things! Well done, you!
You might consider nominating work you are proud of to the Remix Project Showcase!

Example
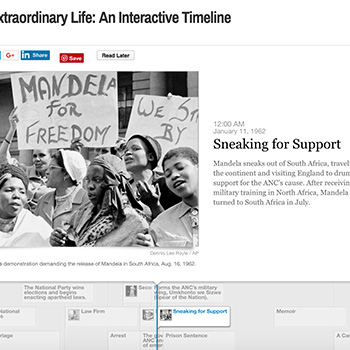
Get Inspired
Explore examples of similar projects.
Tame Your Tools
Master the skills used in this project.
Get Help
Notre Dame has many helpful resources, including our Media Corps coaching staff, located in the Hesburgh Library.
Give Feedback
Remix is continually evolving. Please help us improve by providing feedback on this project or any other feature of Remix.